Can I choose which documents to synchronize to my export sync accounts?
You can configure GetMyInvoices to sync documents with your export sync accounts based on the criteria you choose. Choose to only sync documents associated with a certain online portal or custom company profile, falling within a specific date range, or tagged in a certain way. Find out how you can customize your export sync settings by following the steps below.
Restrict syncing for documents from online portals / company profiles
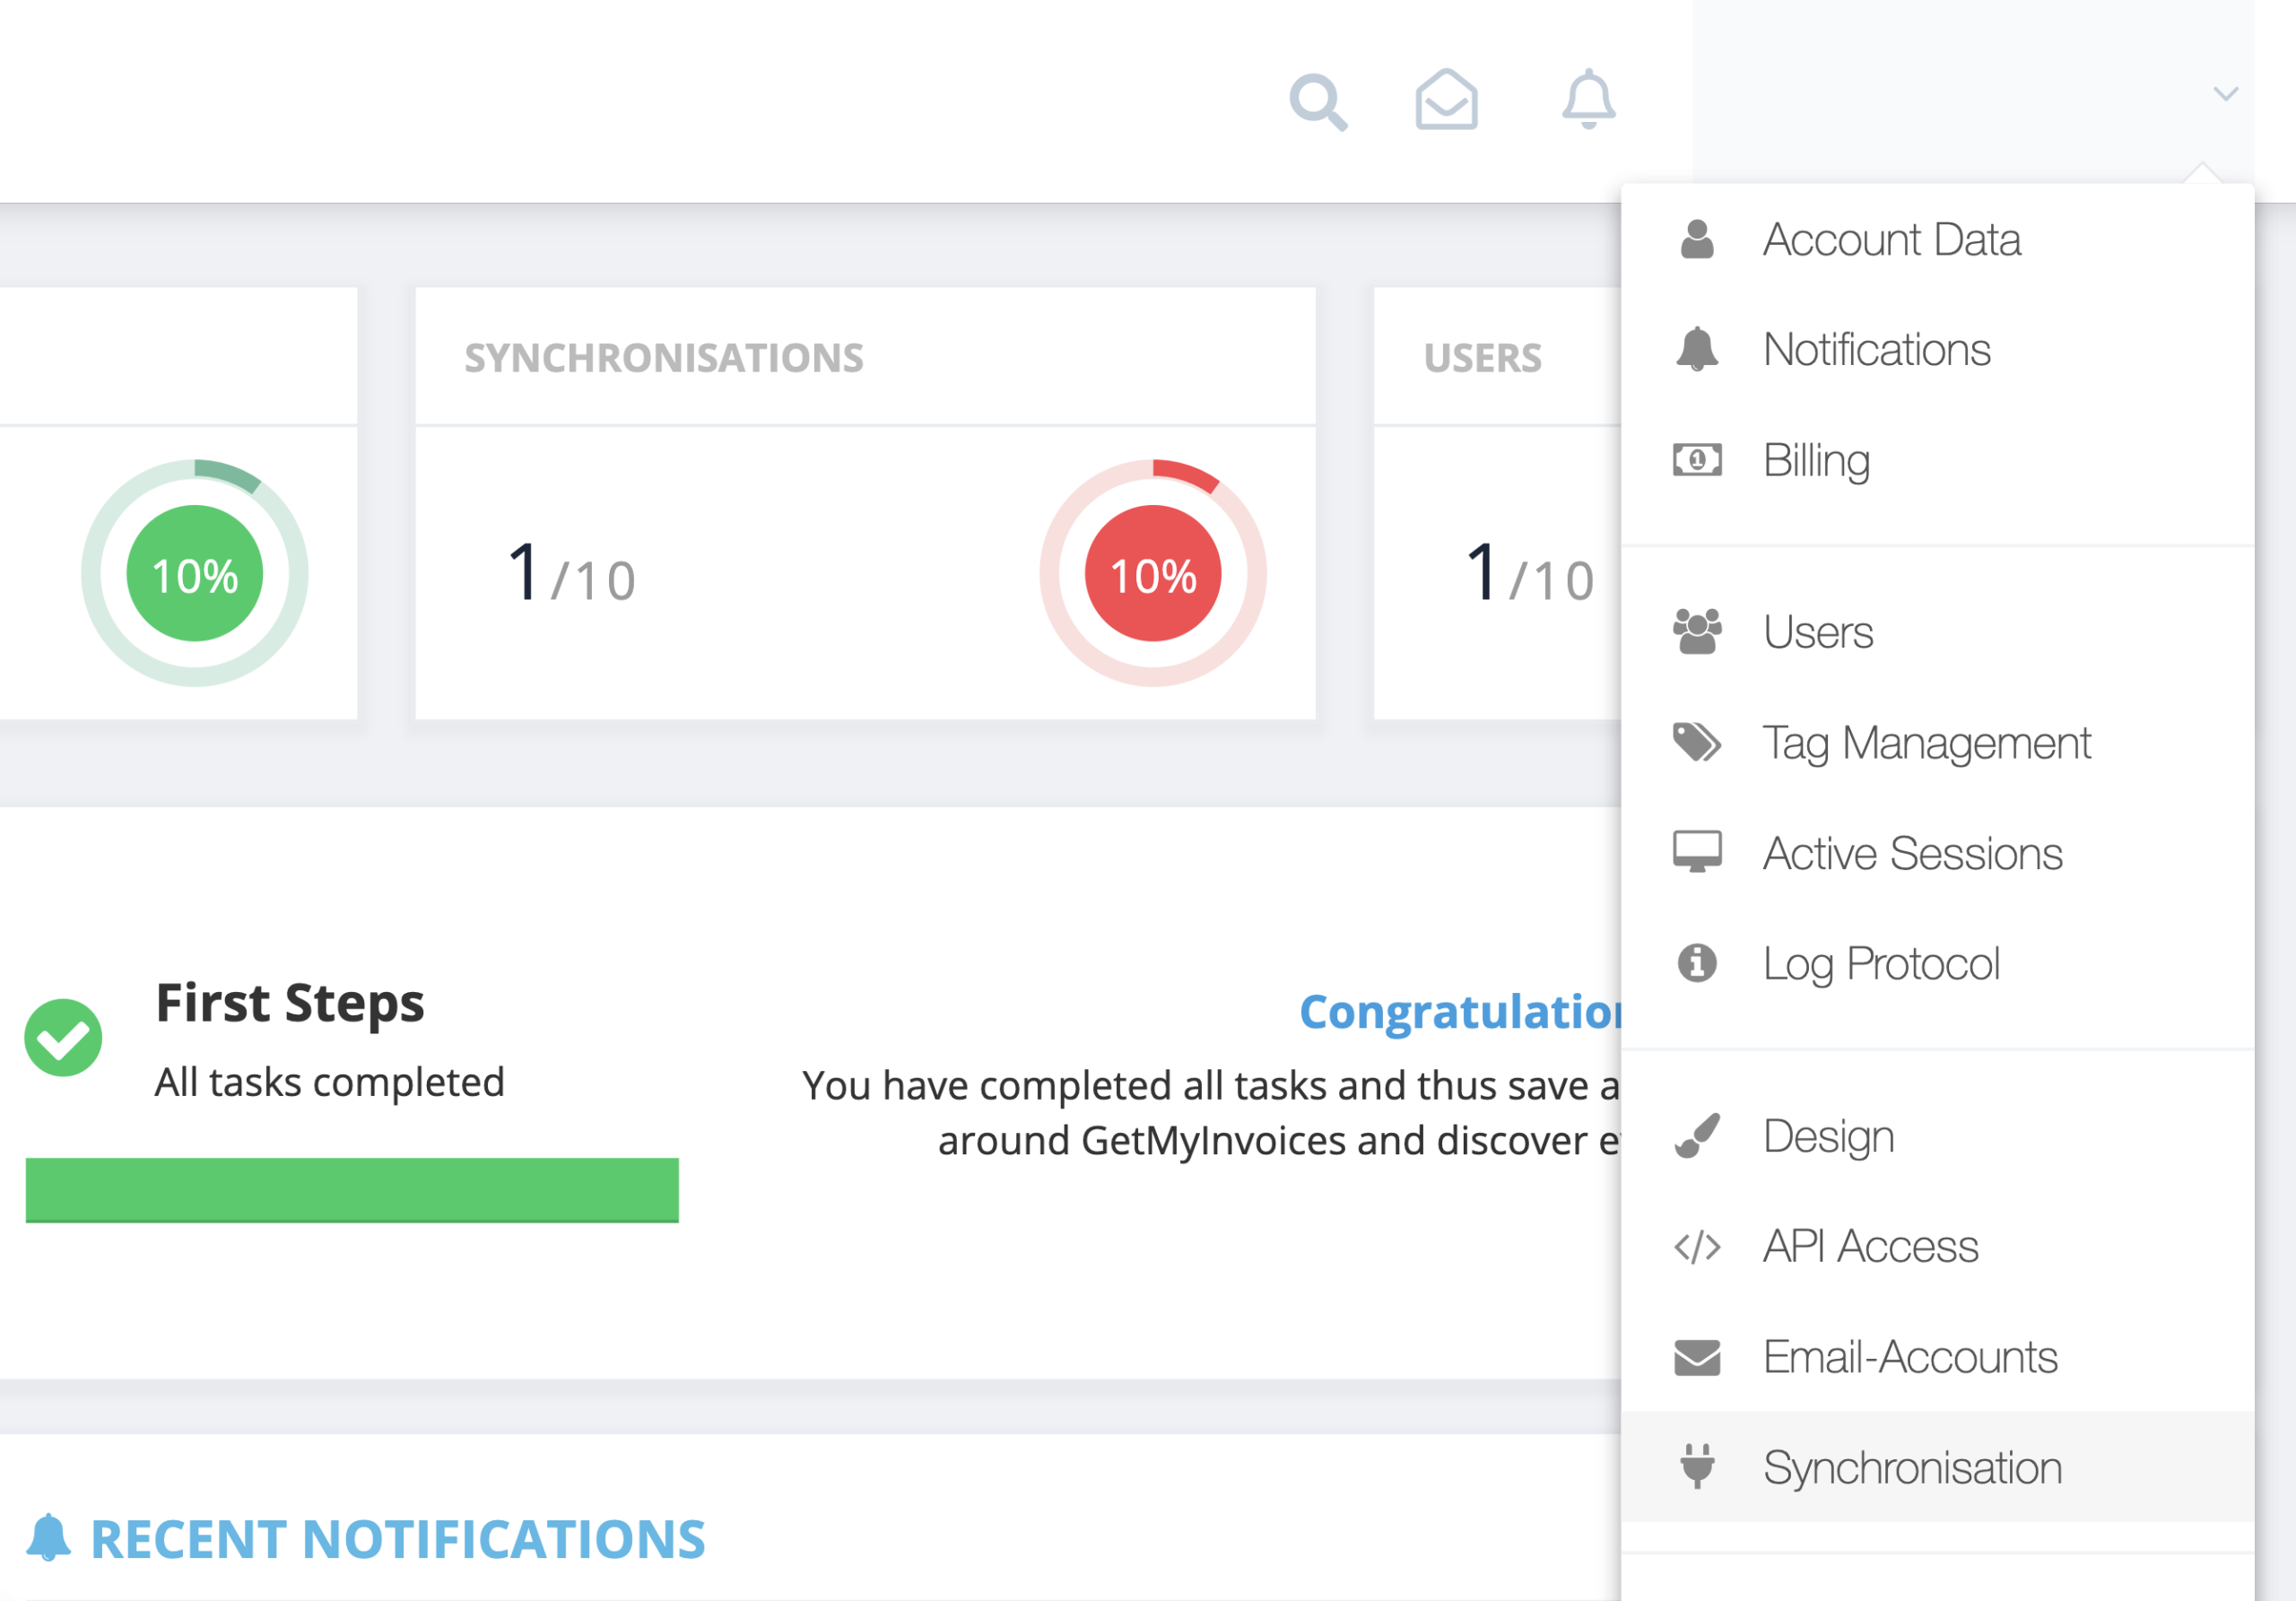
Step 1. From the GetMyInvoices dashboard, navigate to your account name on the top right corner then click Synchronization on the drop-down menu.
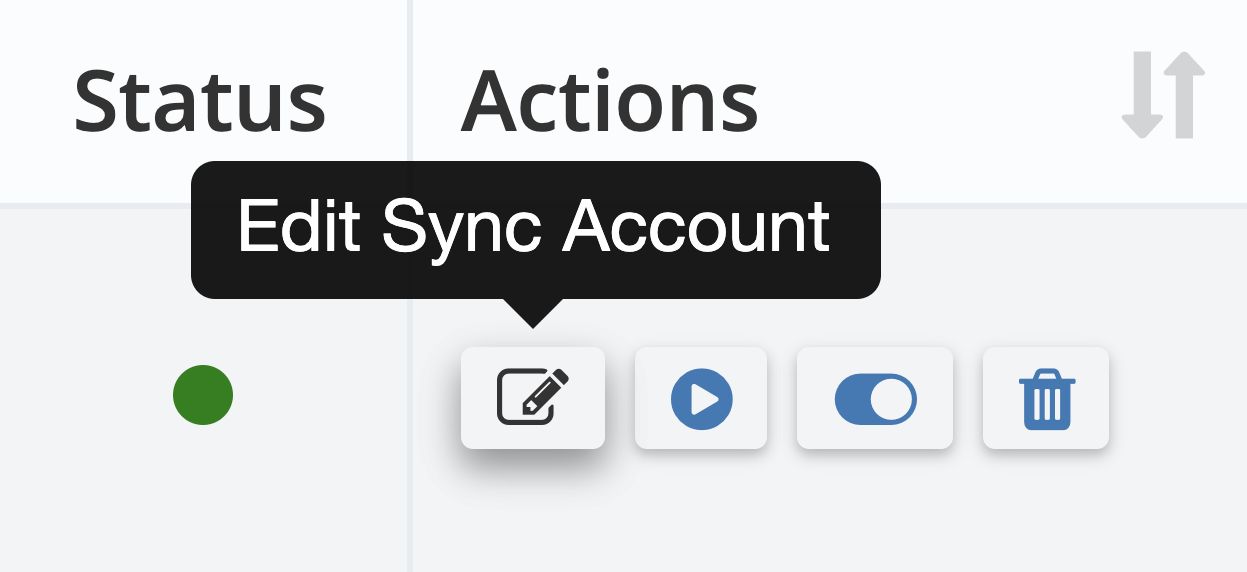
Step 2. Find the specific export sync account you want to configure, then click Edit Sync Account under Actions.
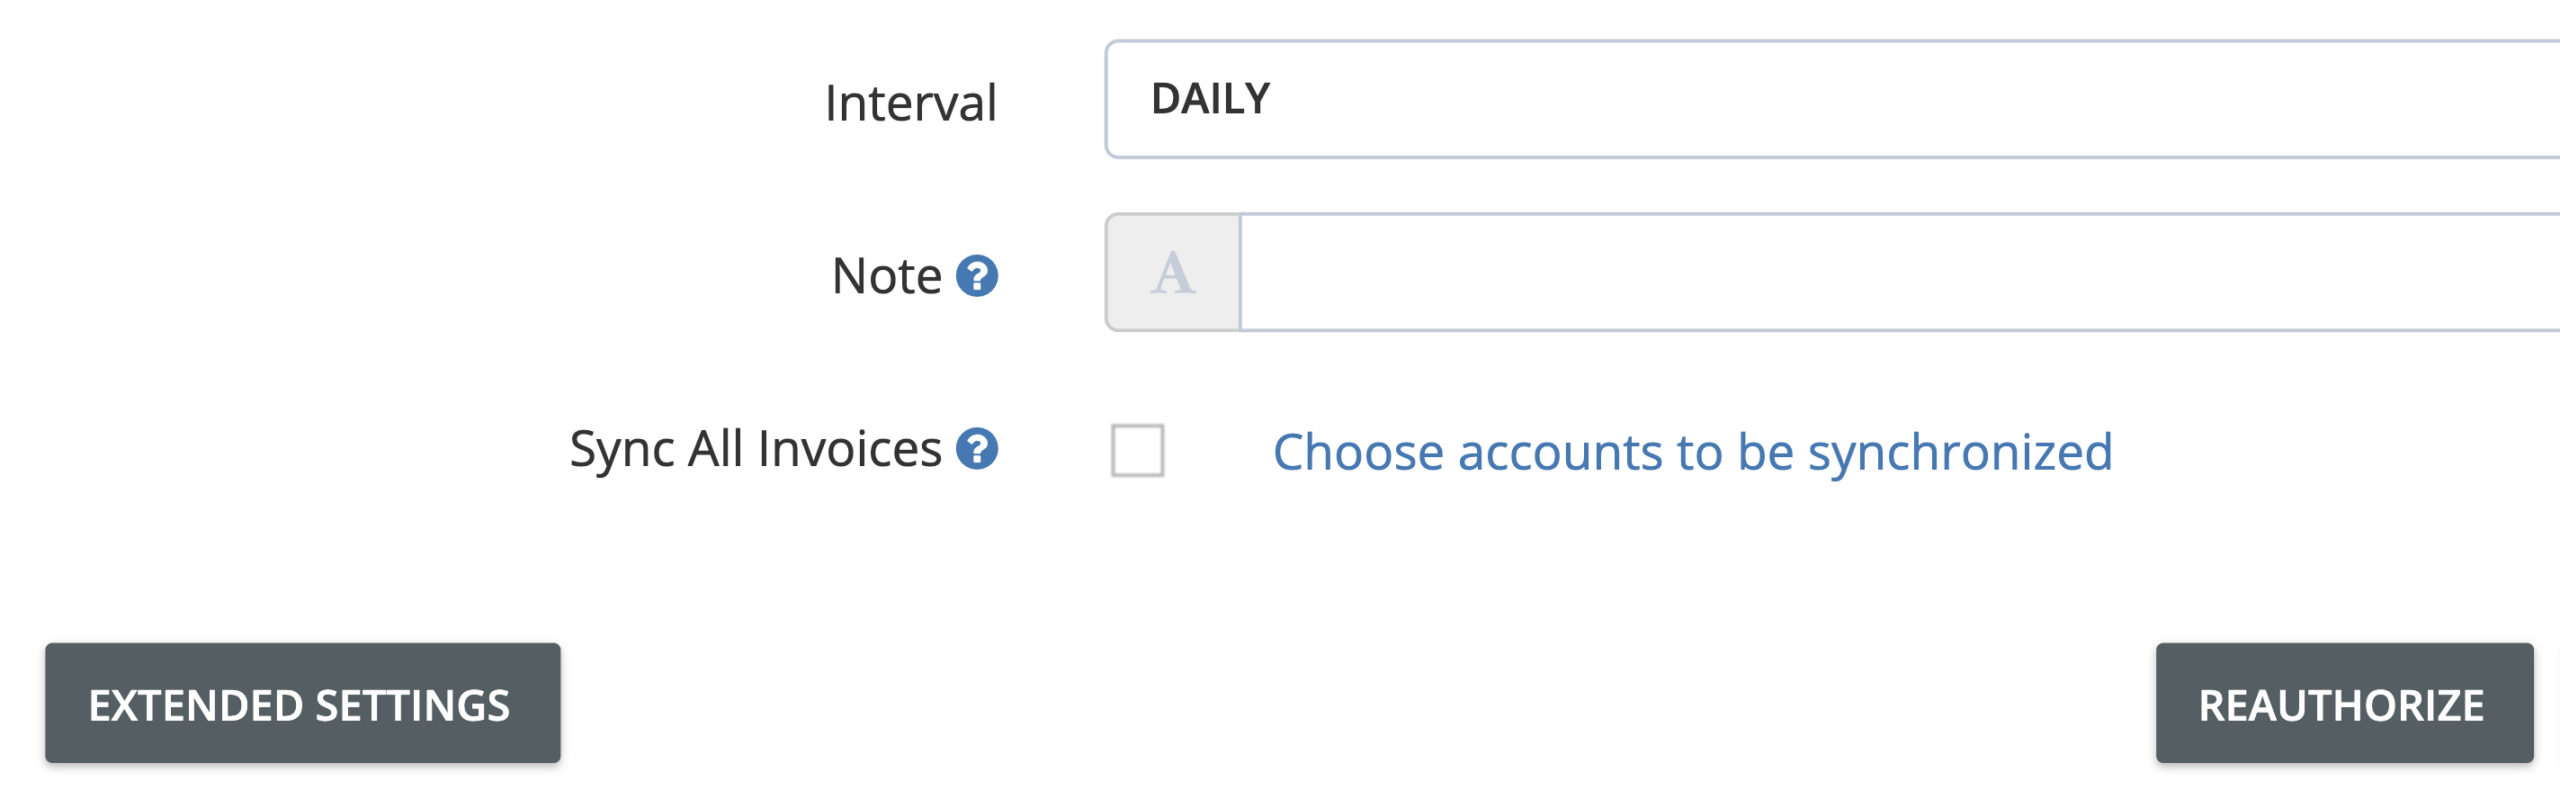
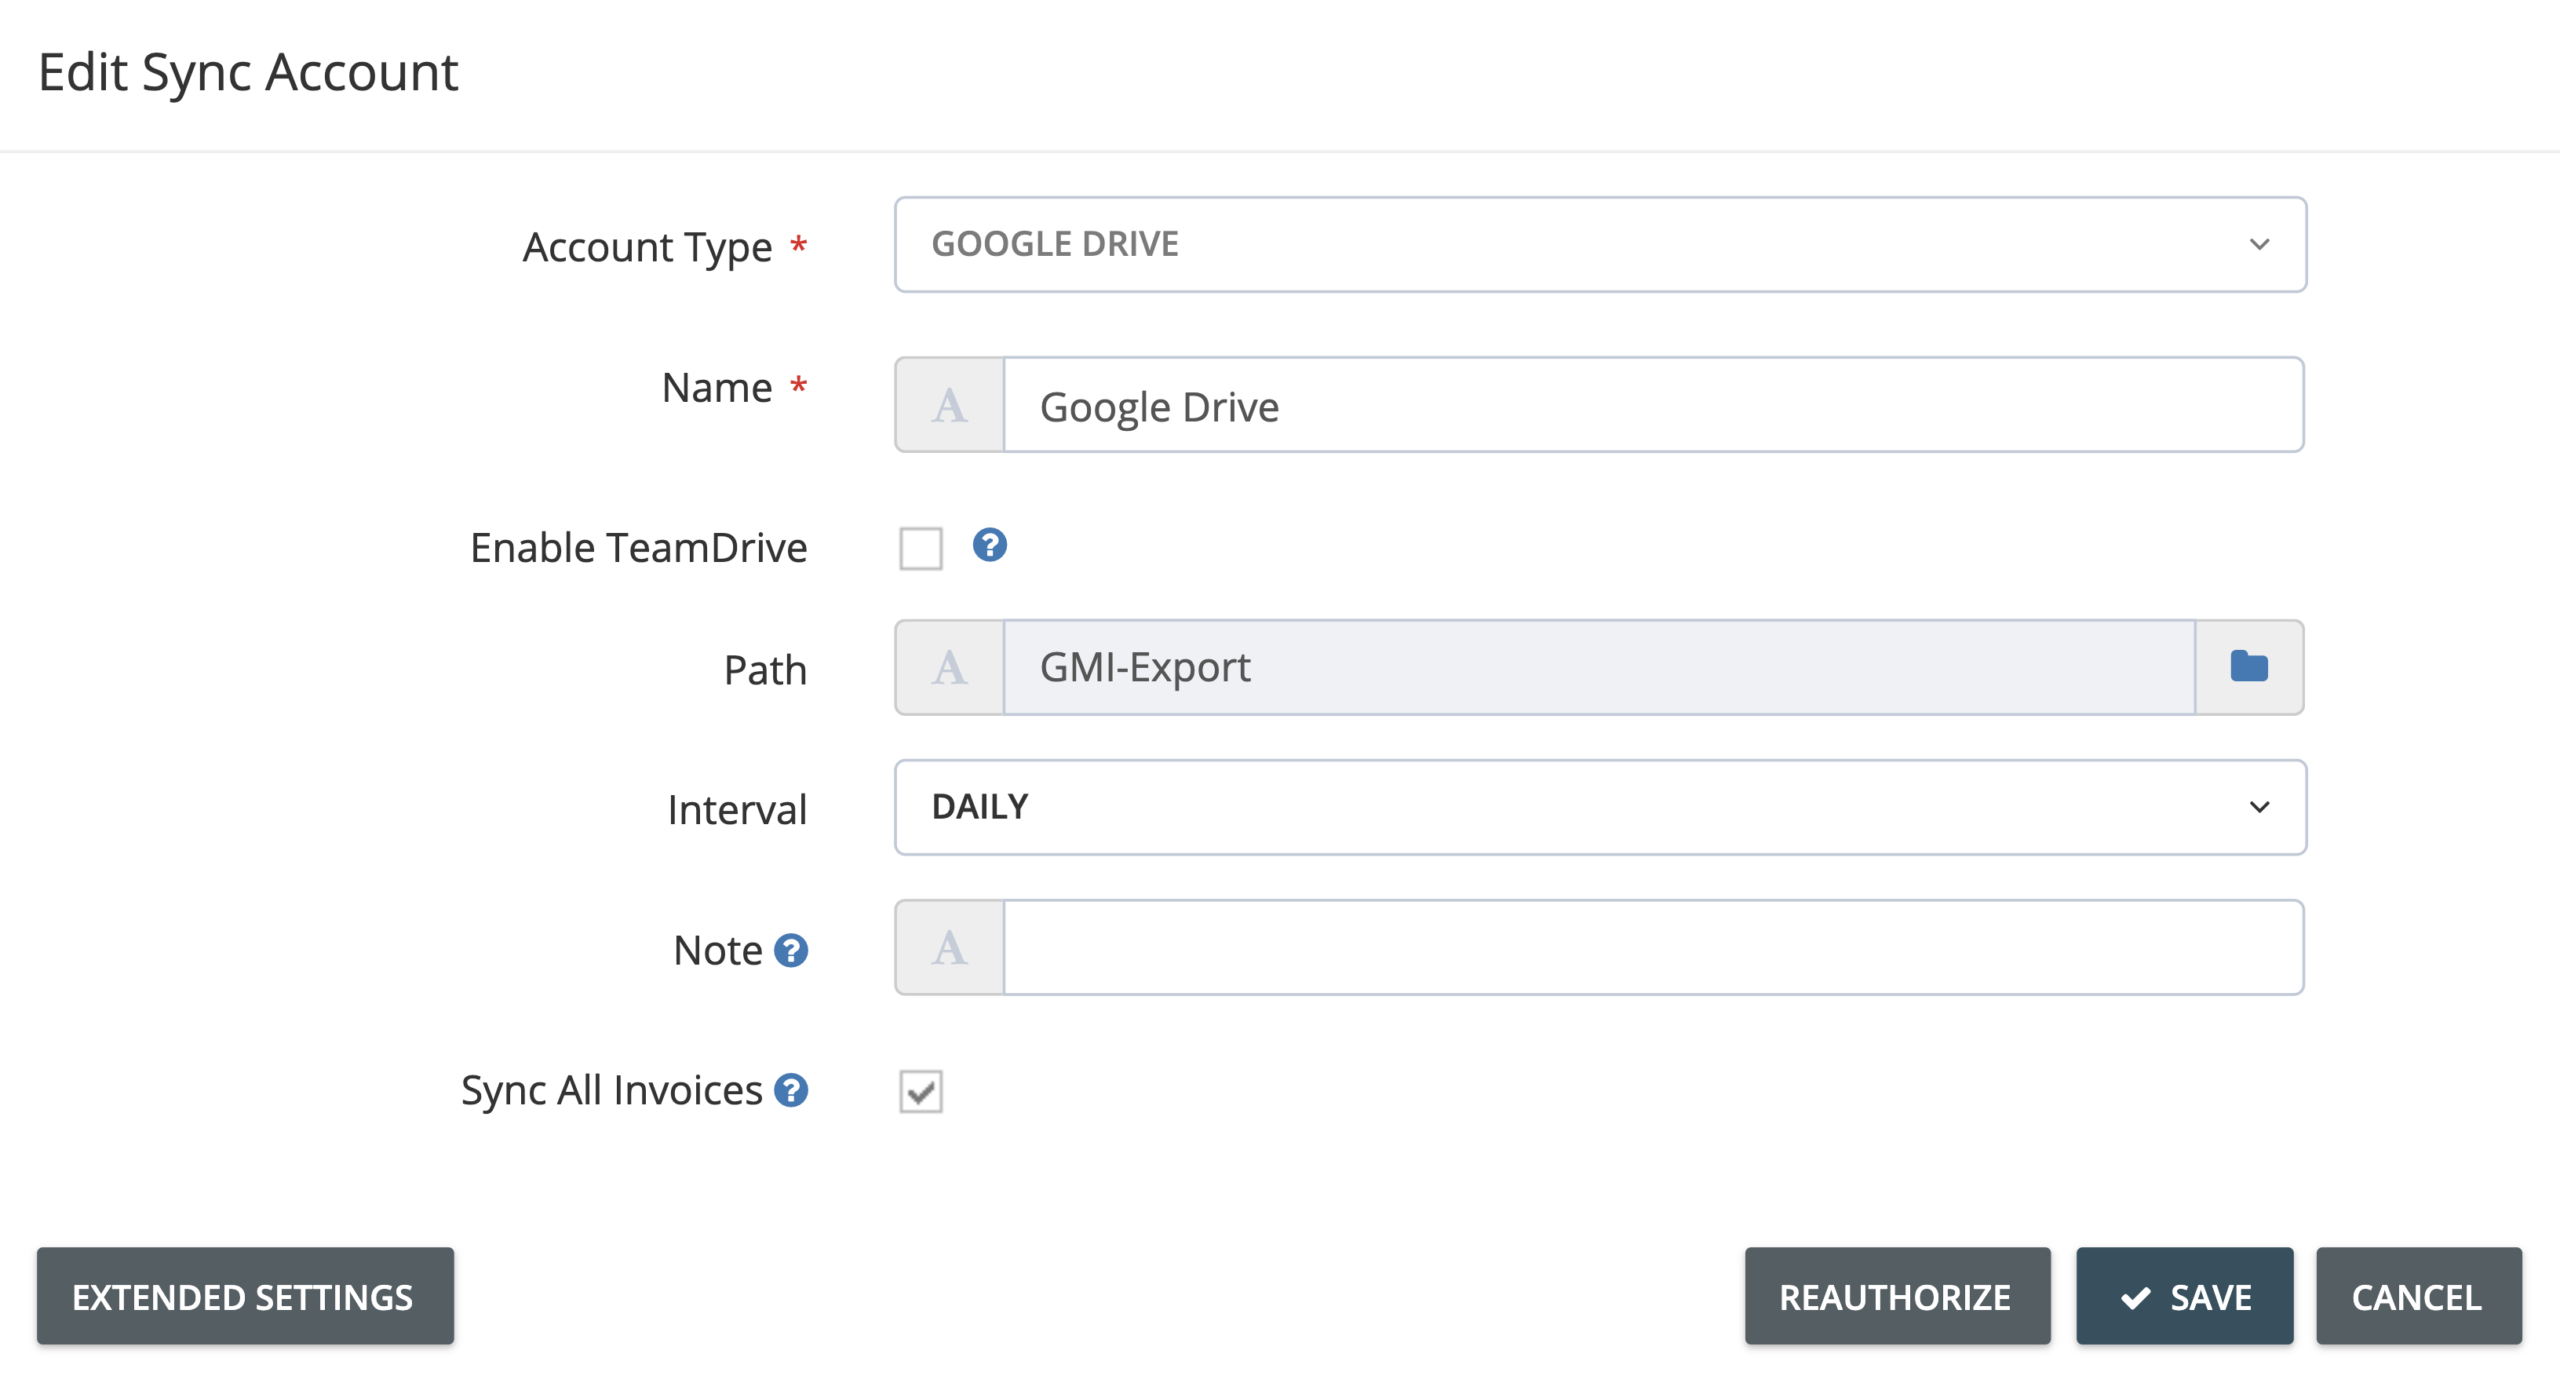
Step 3. On the Edit Sync Account window, untick the checkbox next to Sync All Invoices. If this checkbox is already unticked, click Choose Accounts to be Synchronized.
Step 4. All your connected online portals and custom company profiles will be shown as a checklist on the Companies & Portals window. From this list you can choose which companies’ invoices and documents you want to synchronize with your export sync account. Tick the checkbox next to the online portal or company you want to include in your export sync configuration.
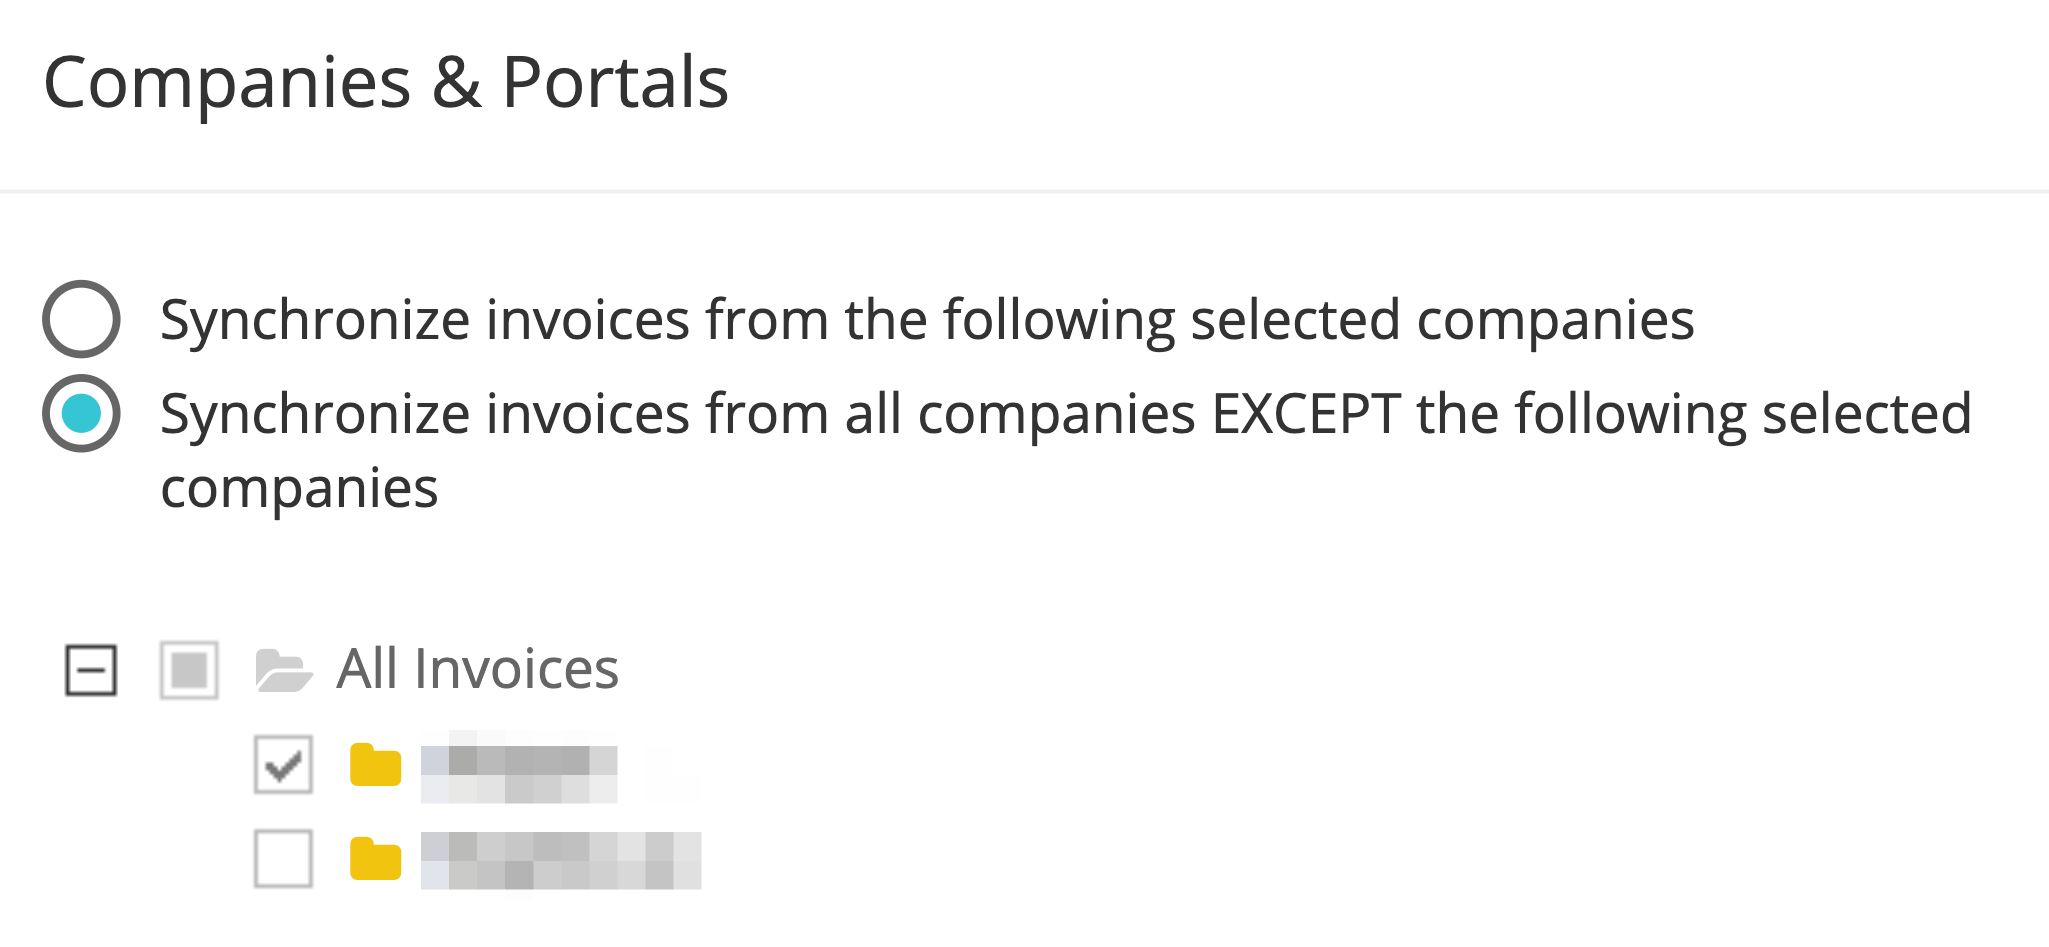
Step 5. Finalize your export sync configuration by choosing whether to include or exclude the selected companies and portals for syncing to your export sync account. Click the radio button next to your desired option.
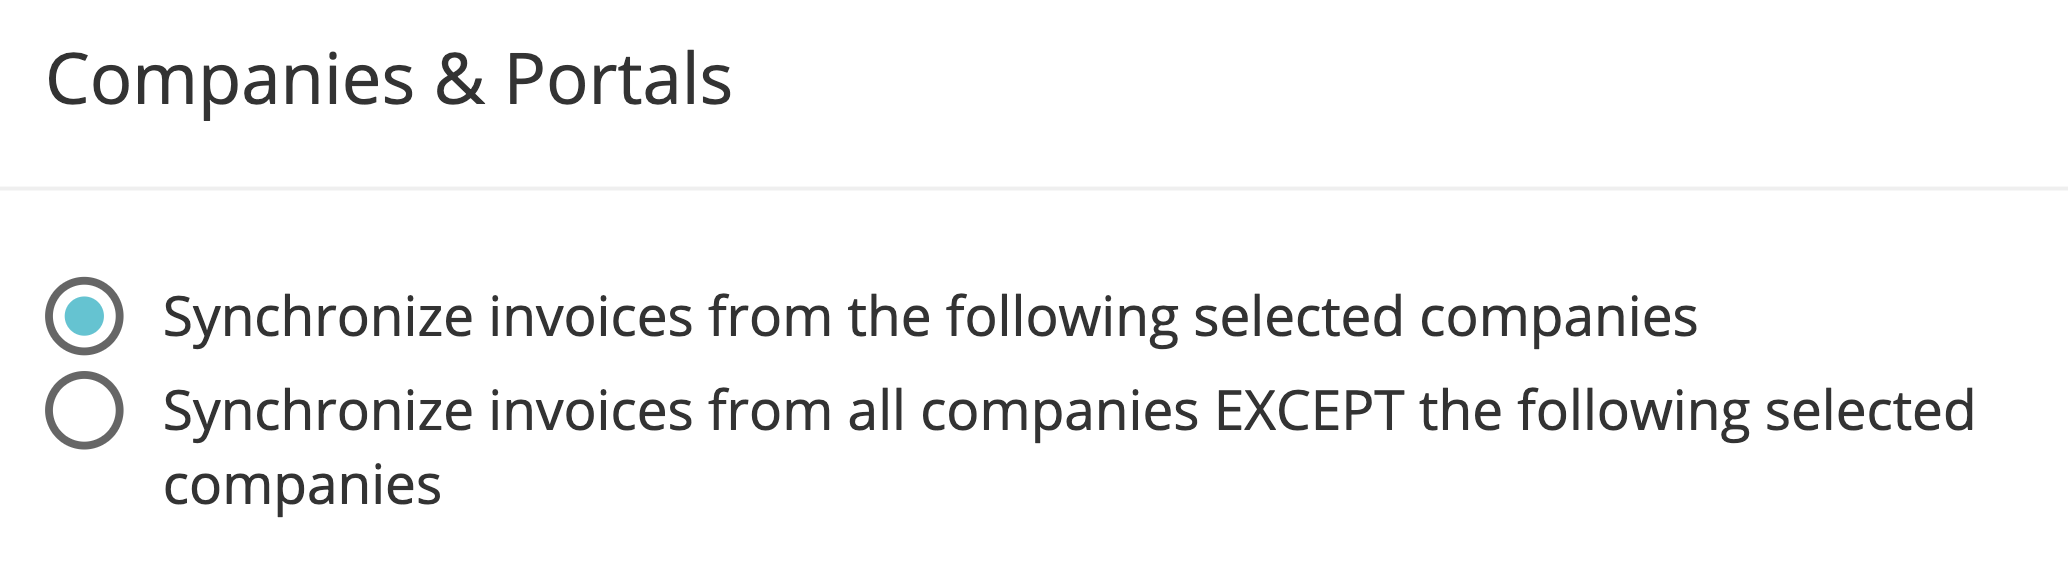
- Synchronize invoices from the following selected companies: This option will enable syncing of your invoices from the online portals and company profiles you have selected in the checklist.
- Synchronize invoices from all companies EXCEPT the following selected companies: This option will exclude invoices coming from the portals and companies you have selected in the checklist from being synced to your export sync account.
Step 6. After configuring your sync settings, click Continue to go back to the Edit Sync Account window. Then click Save to confirm your changes. Your sync preferences will take effect on the next scheduled sync.
Restrict syncing for documents within a specified date range
Step 1. From the GetMyInvoices dashboard, navigate to your account name on the top right corner, then click Synchronization on the drop-down menu.
Step 2. Find the specific export sync account you want to configure, then click Edit Sync Account under Actions.
Step 3. On the Edit Sync Account window, click Extended Settings on the lower left corner.
Step 4. You will find date range options under Restrictions. Click the radio button next to the option you prefer.
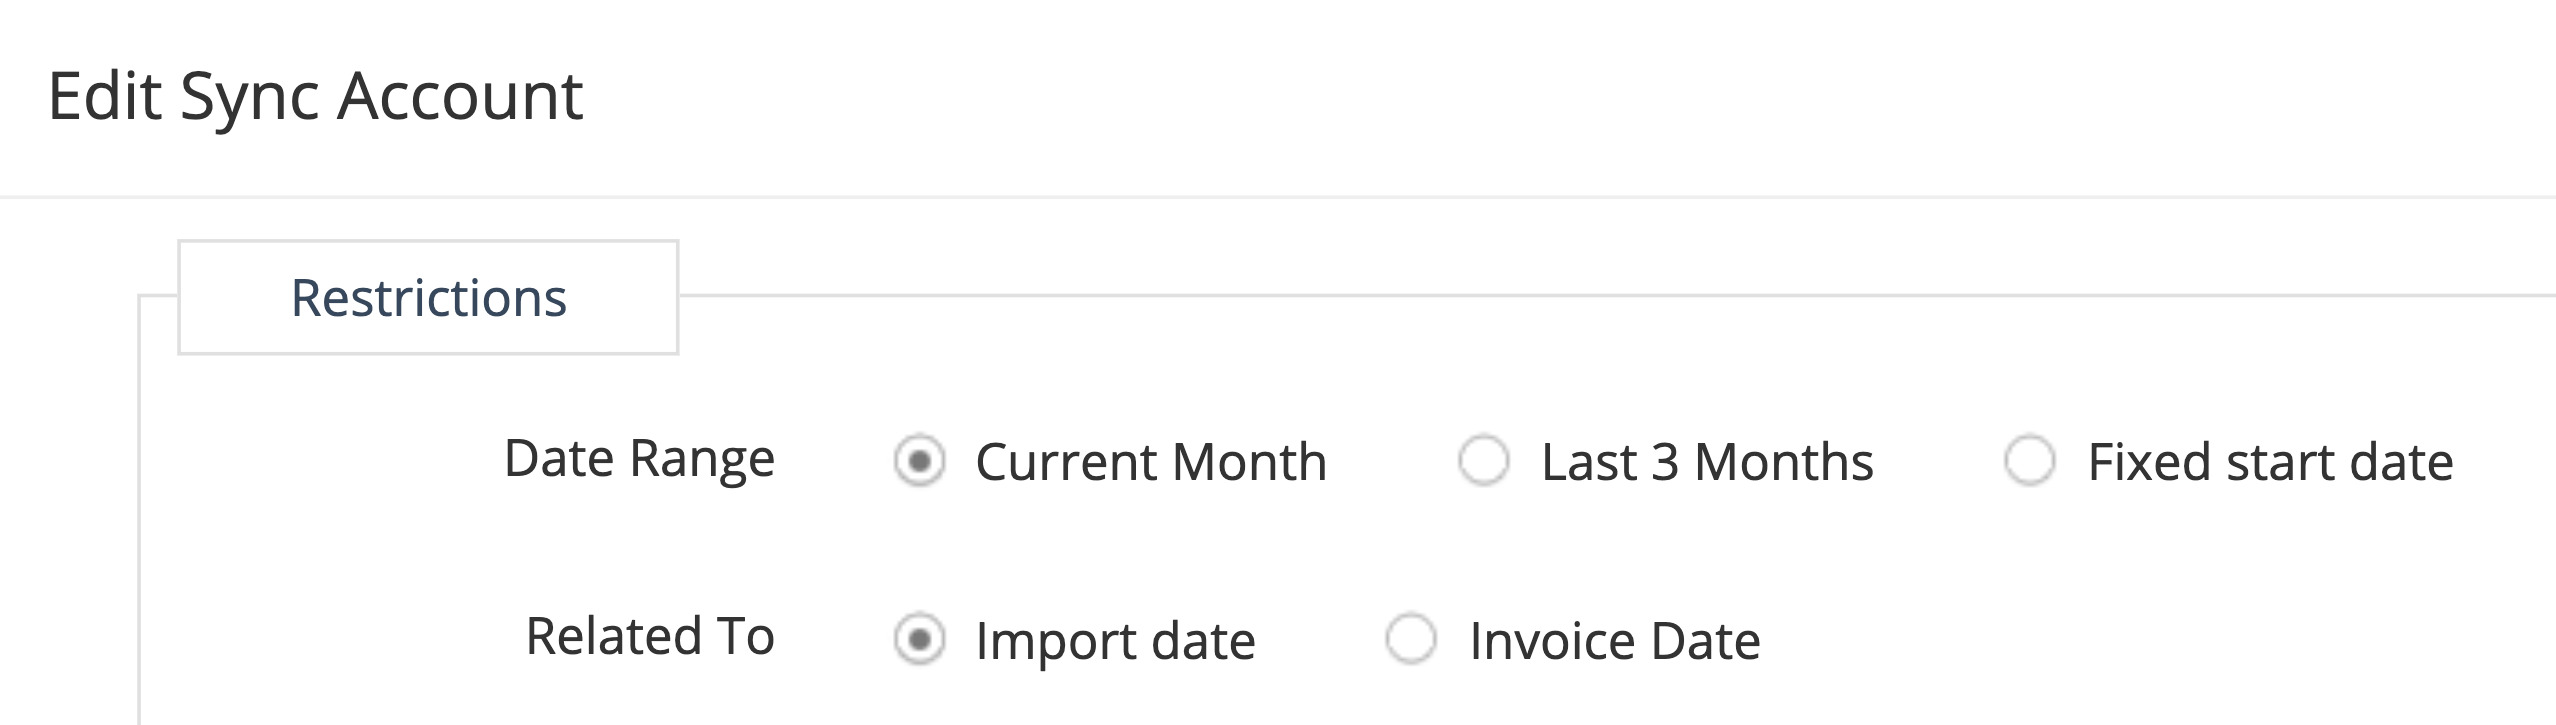
- Current Month: This option lets you sync invoices either imported or dated within the current month.
- Last 3 Months: Sync invoices that were either imported or dated within the last 3 months.
- Fixed Start Date: Choose to sync invoices that were imported or dated later than the start date.
Step 5. On the Related To option, choose the date basis for your chosen date range option. The Import Date option will enable export syncing according to the invoice import date in GetMyInvoices. The Invoice Date option will trigger syncing based on the actual date information found on the invoice.
Step 6. Click Save to confirm your changes. Your sync preferences will take effect on the next scheduled sync.
Restrict syncing for documents with specific attributes
Step 1. From the GetMyInvoices dashboard, navigate to your account name on the top right corner, then click Synchronization on the drop-down menu.
Step 2. Find the specific export sync account you want to configure, then click Edit Sync Account under Actions.
Step 3. On the Edit Sync Account window, click Extended Settings on the lower left corner.
Step 4. You will find document attribute options under Restrictions.
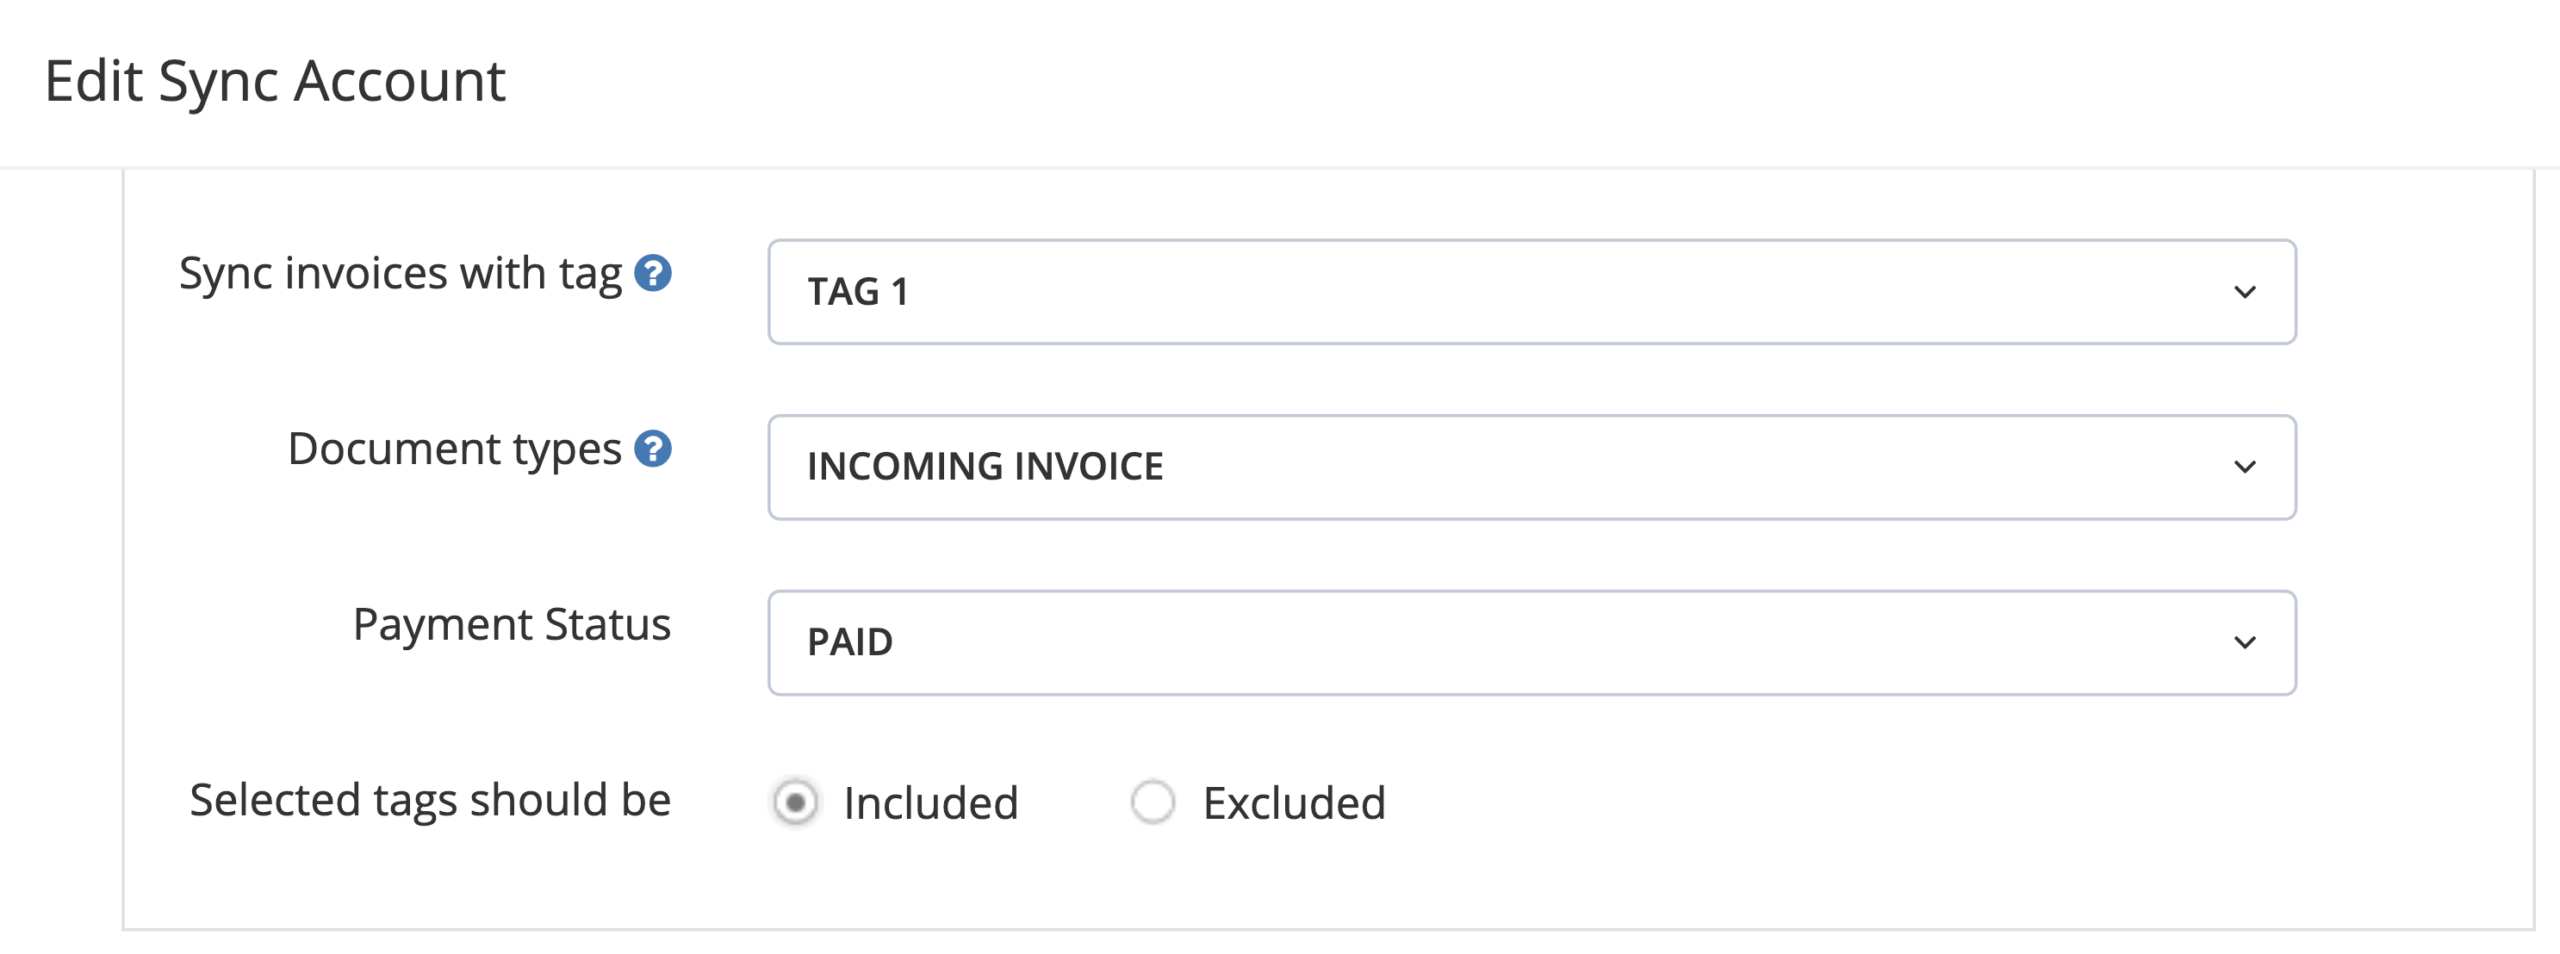
- Sync Invoices with Tag: This option lets you define which invoices you want to synchronize based on their tags.
- Document Types: Choose the types of documents you want to sync. You can choose more than one document type.
- Payment Status: This allows you to sync invoices according to their payment status.
- Selected Tags Should Be: This option acts either as an include or an exclude filter for tagged invoices.
Step 5. Click Save to confirm your changes. Your sync preferences will take effect on the next scheduled sync.