What are tags in GetMyInvoices, how do they work, and how do I manage them?
Tags are a useful way to identify and categorize your invoices and other documents in your GetMyInvoices account. Tagged documents can be easily located with the built-in search feature, making it easy to find specific invoices at any time.
Create your own custom tags
You can create custom tags and assign each of them to any document you’ve imported. Here’s how to create your own tags in GetMyInvoices.
Step 1. From the GetMyInvoices dashboard page, navigate to your account name on the top right corner, then click Tag Management from the drop-down menu.

Step 2:
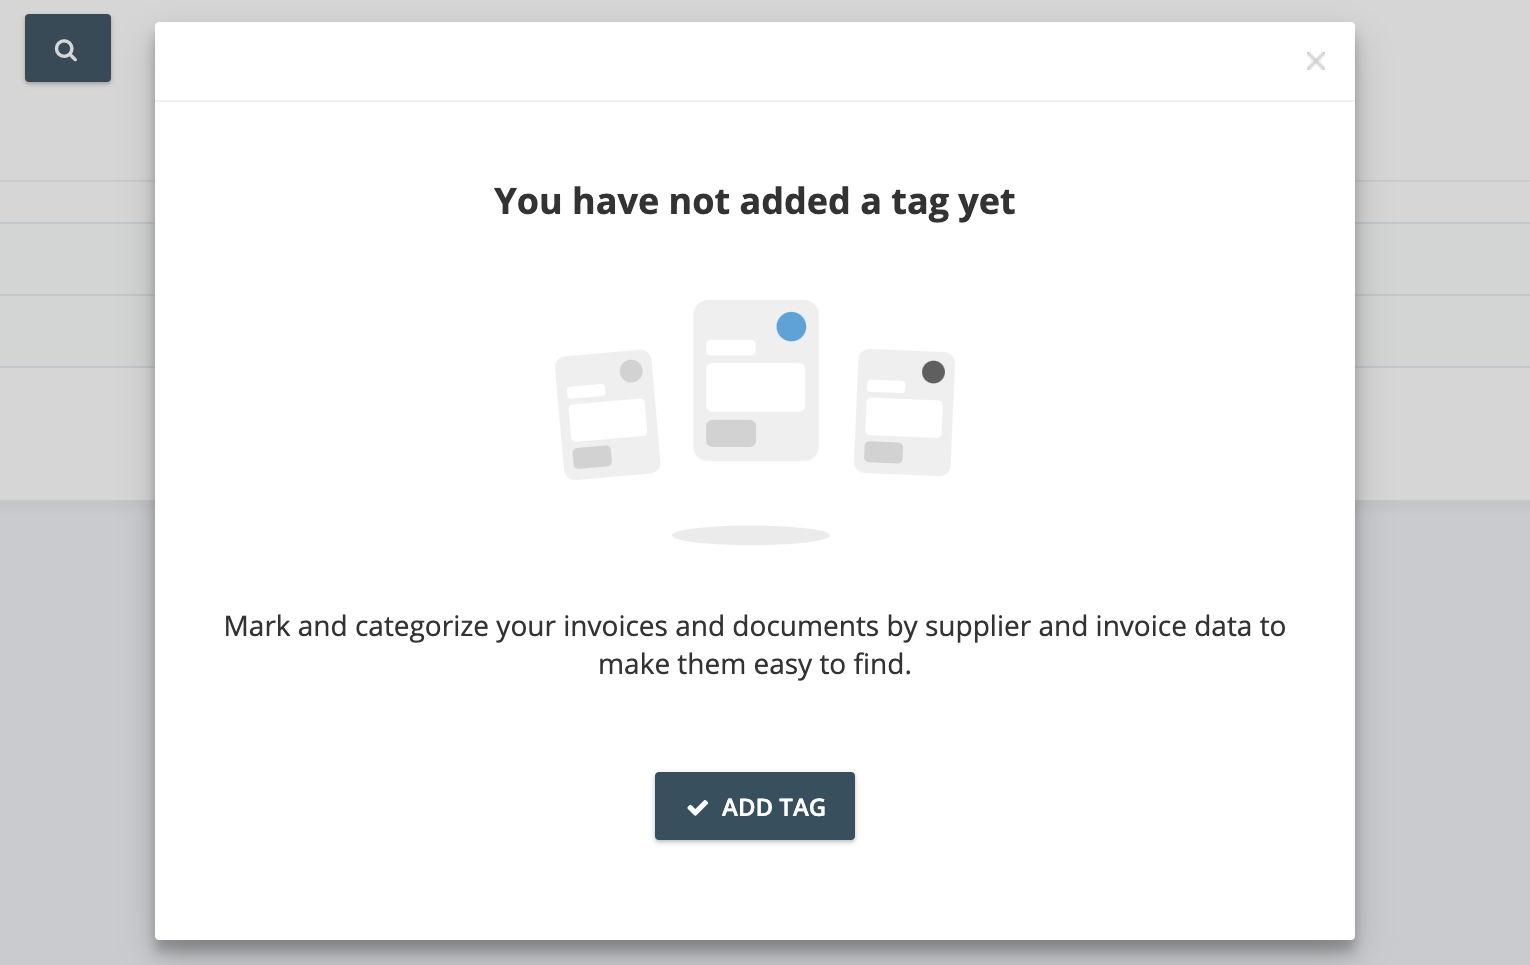
- If you are creating tags for the first time, a dialog window shows up. Click Add New to continue.
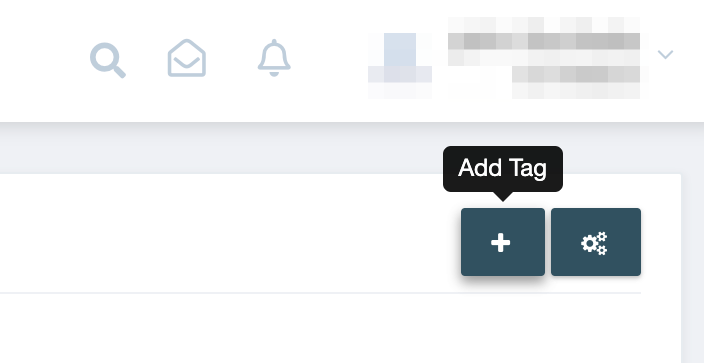
- If you’ve created tags before and would like to create a new one, click the plus icon on the upper right corner of the Tag Management page.
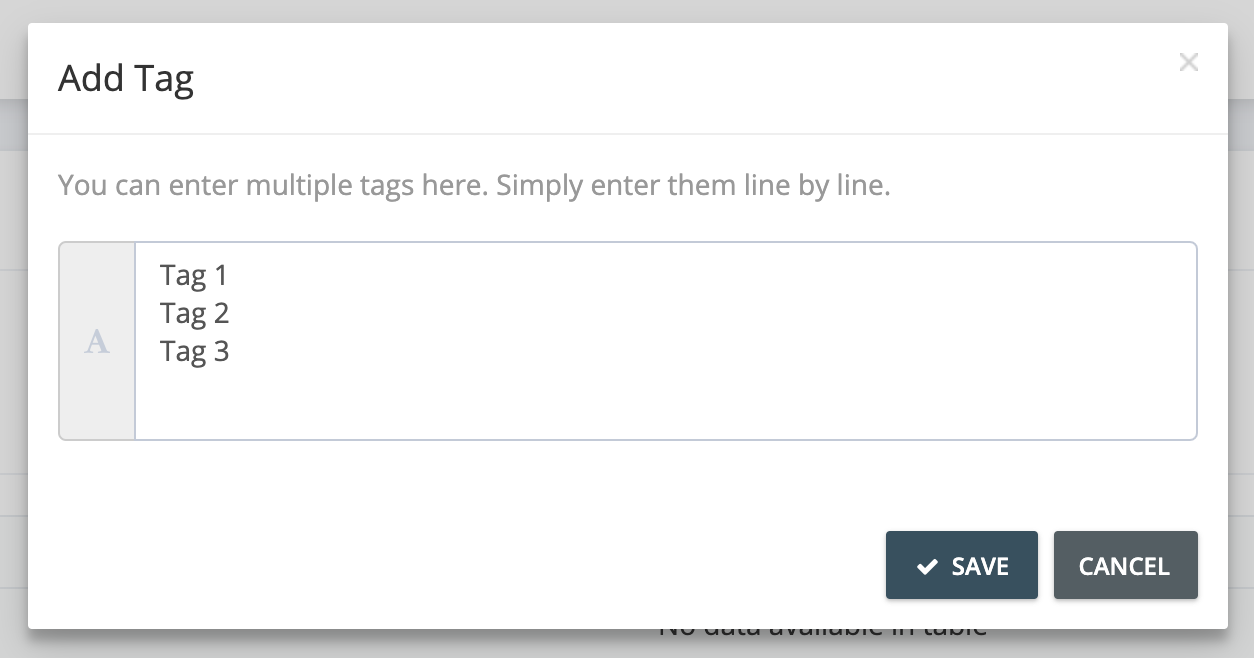
Step 3. On the Add Tag pop-up window, type in your desired tag name/s. To create more than one tag, hit the Enter/Return key. Once done, click Save.
Assign tags to individual documents you’ve already imported
Once you’ve created your custom tags, you can then assign them to individual documents that you’ve already imported to your GetMyInvoices account. This is especially useful when you’ve just created tags and you want to make organizing documents much easier.
Step 1. From the GetMyInvoices dashboard page, click Documents on the left-side menu.
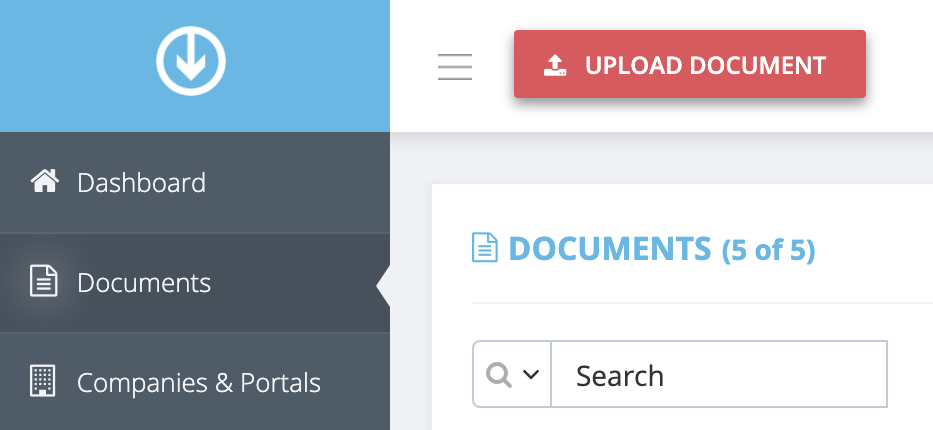
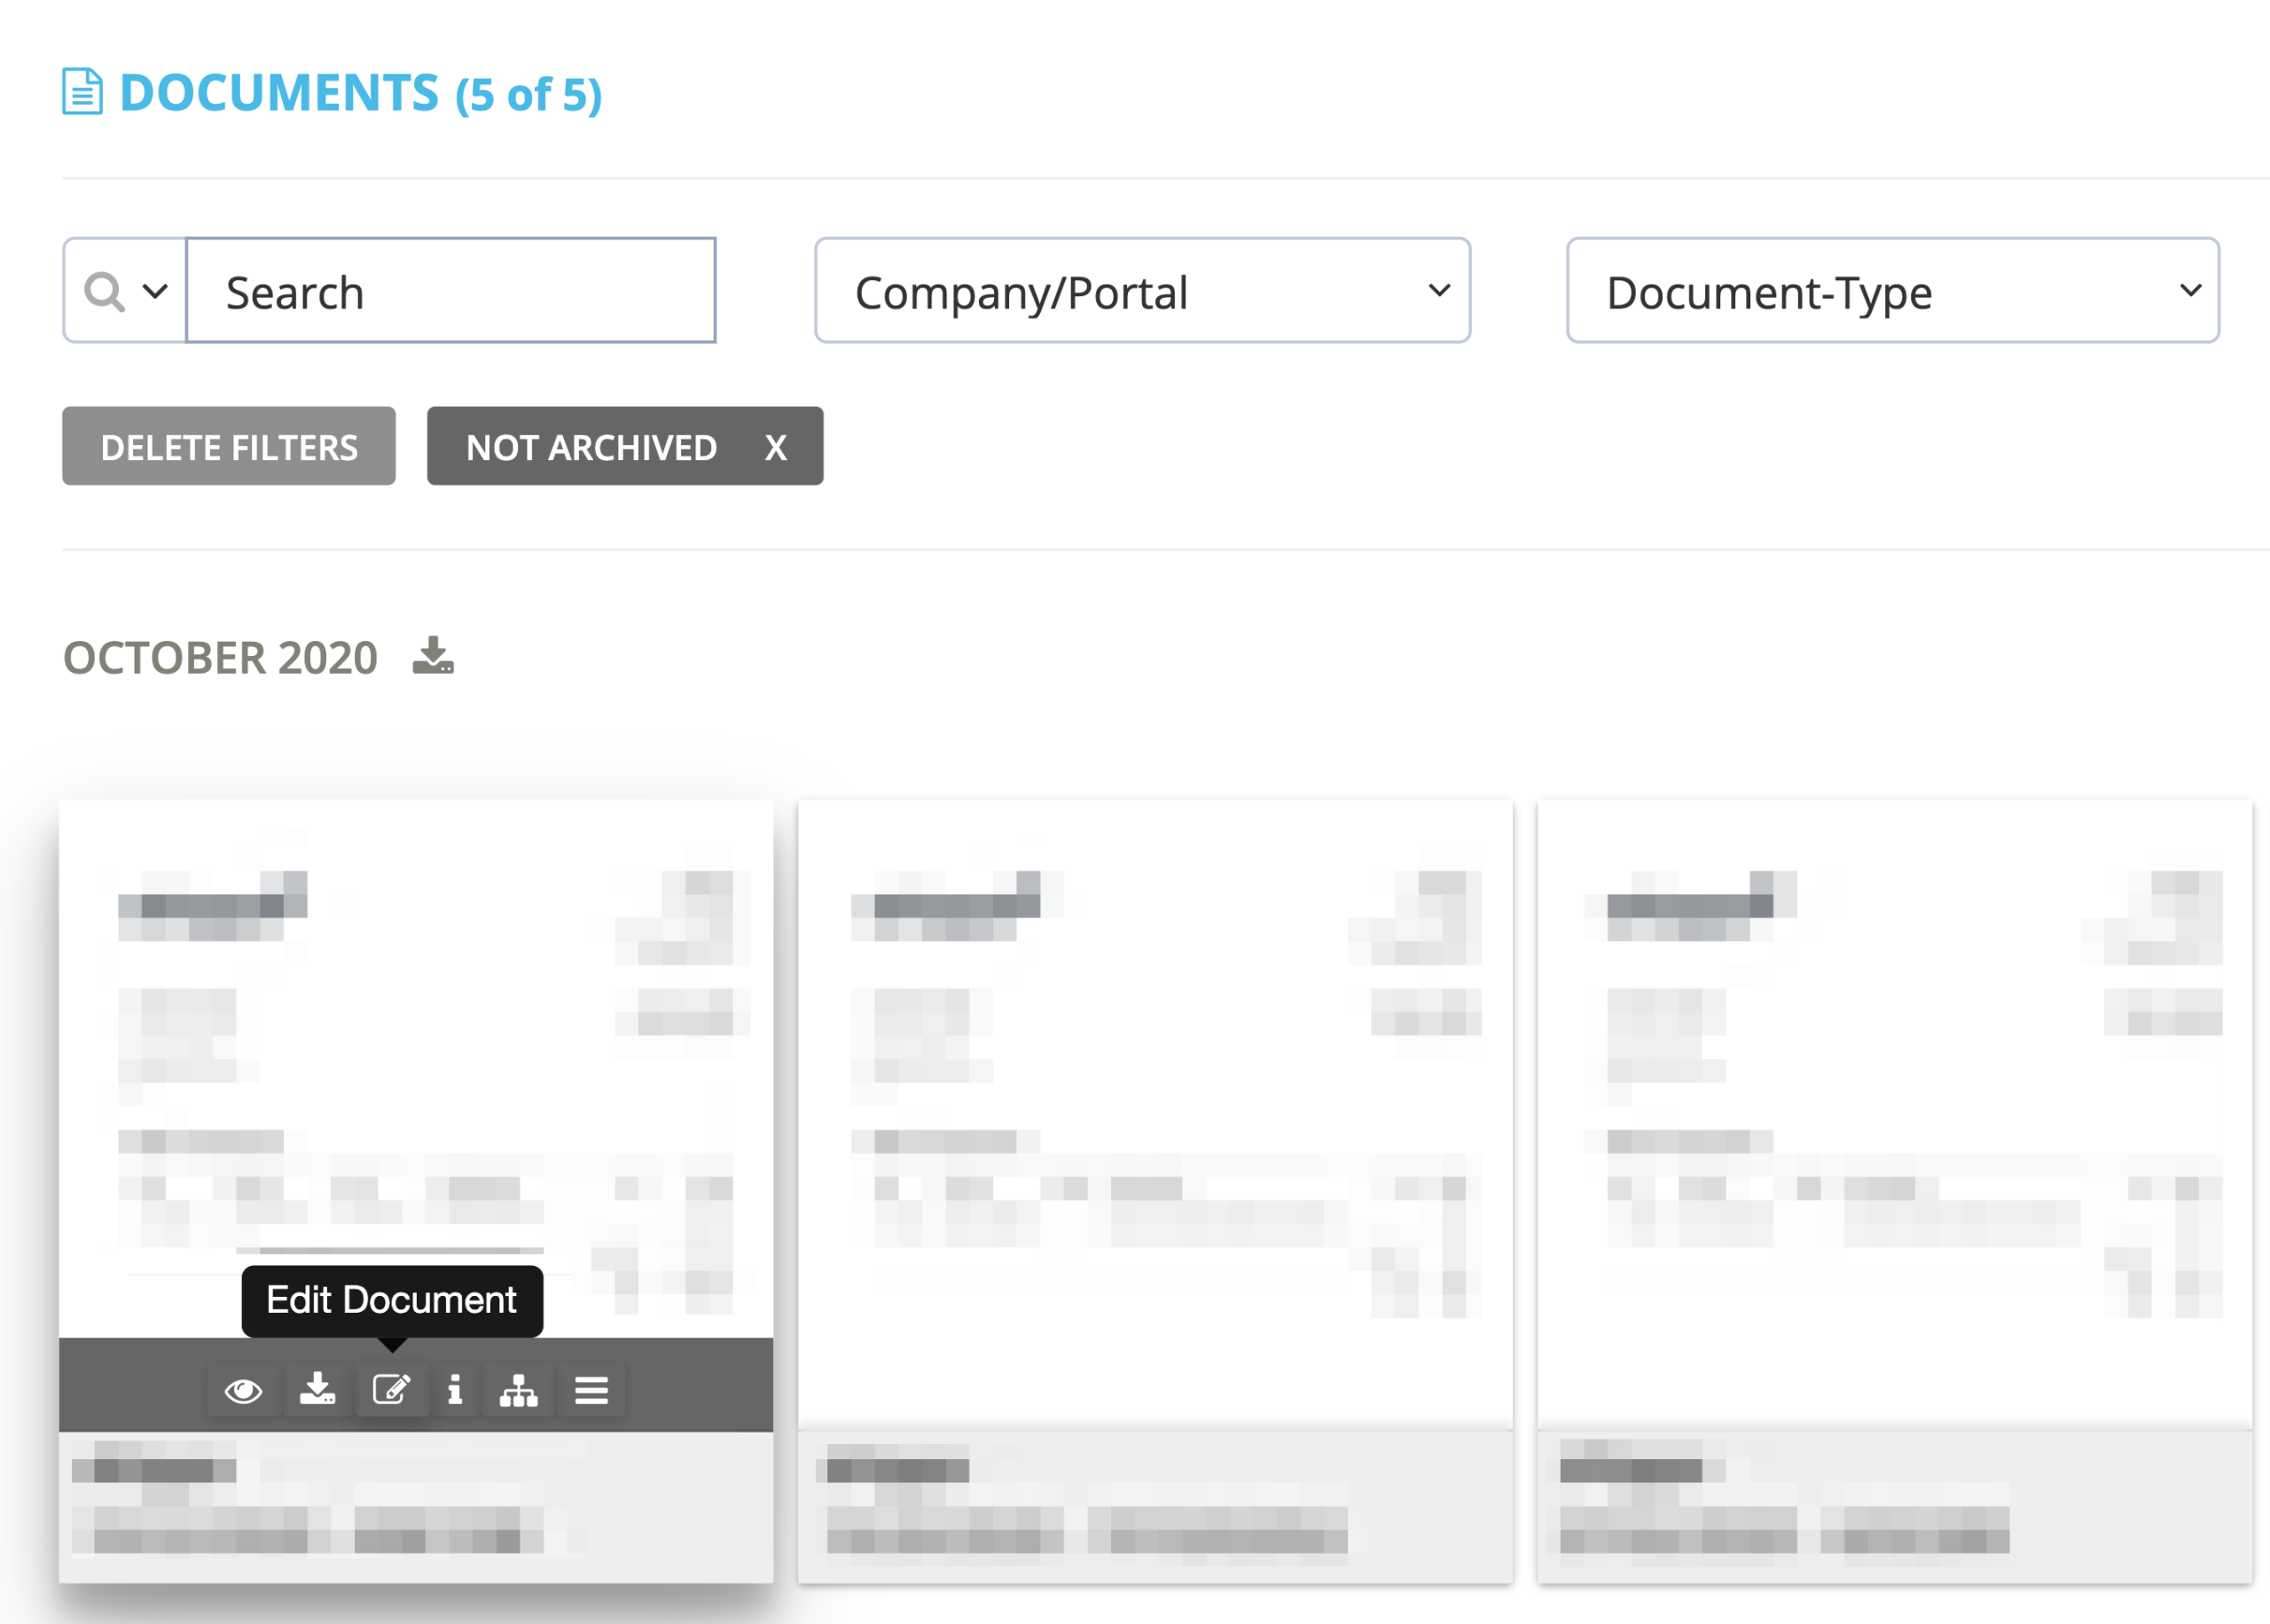
Step 2. You should see all your imported documents on the Documents page. Navigate to any document you want to tag, then click Edit Document (notepad icon).
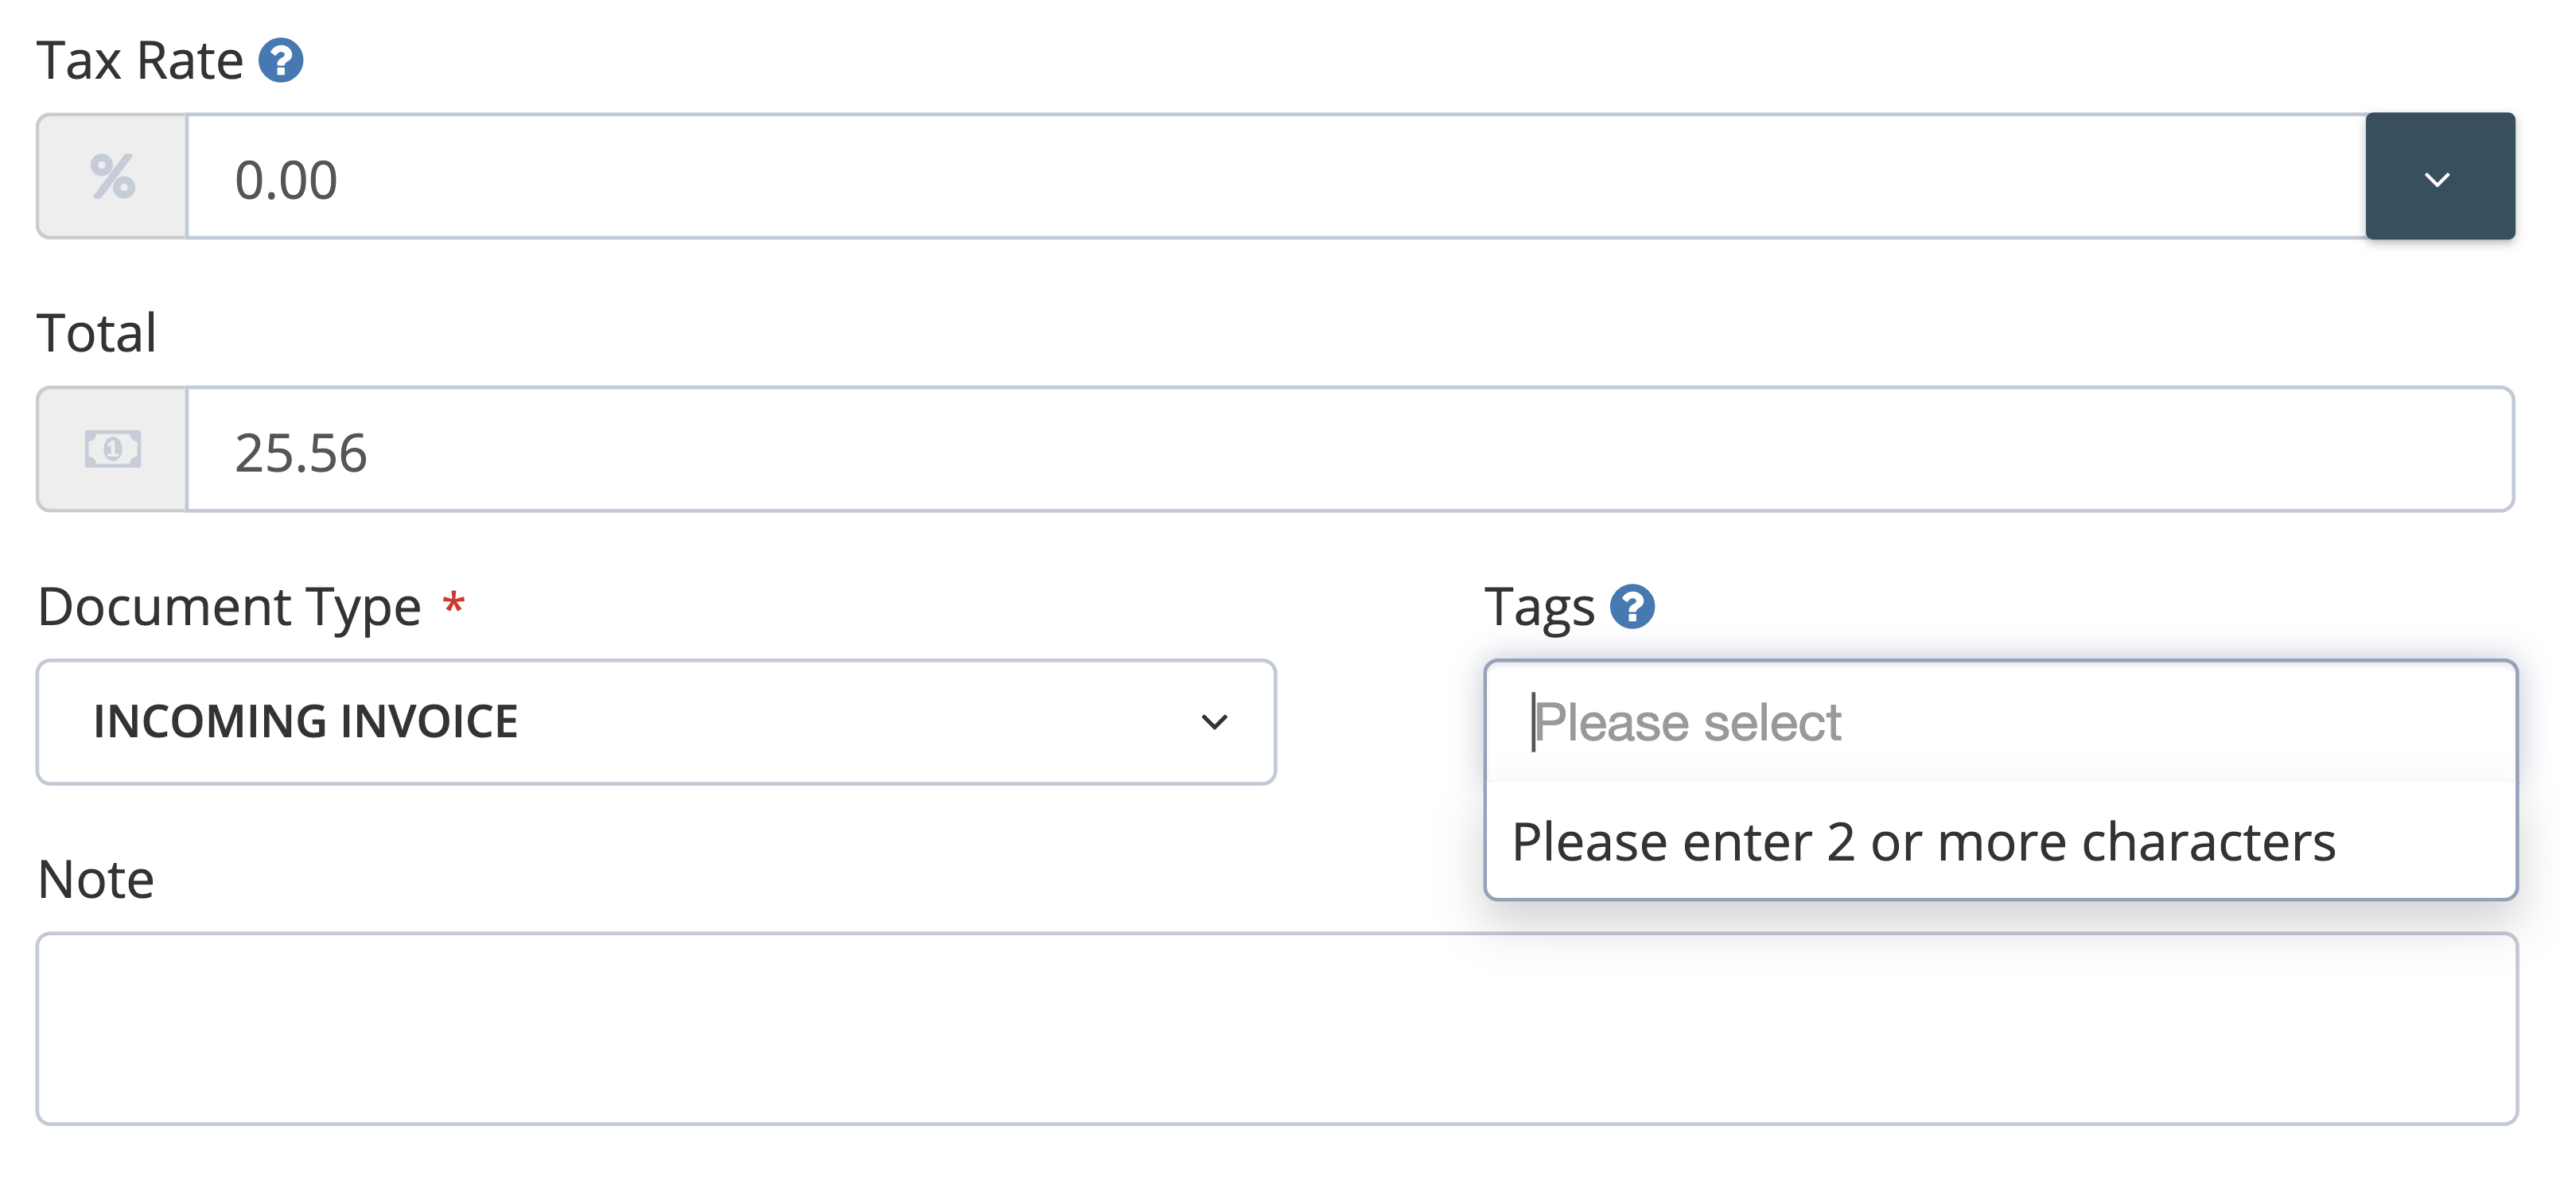
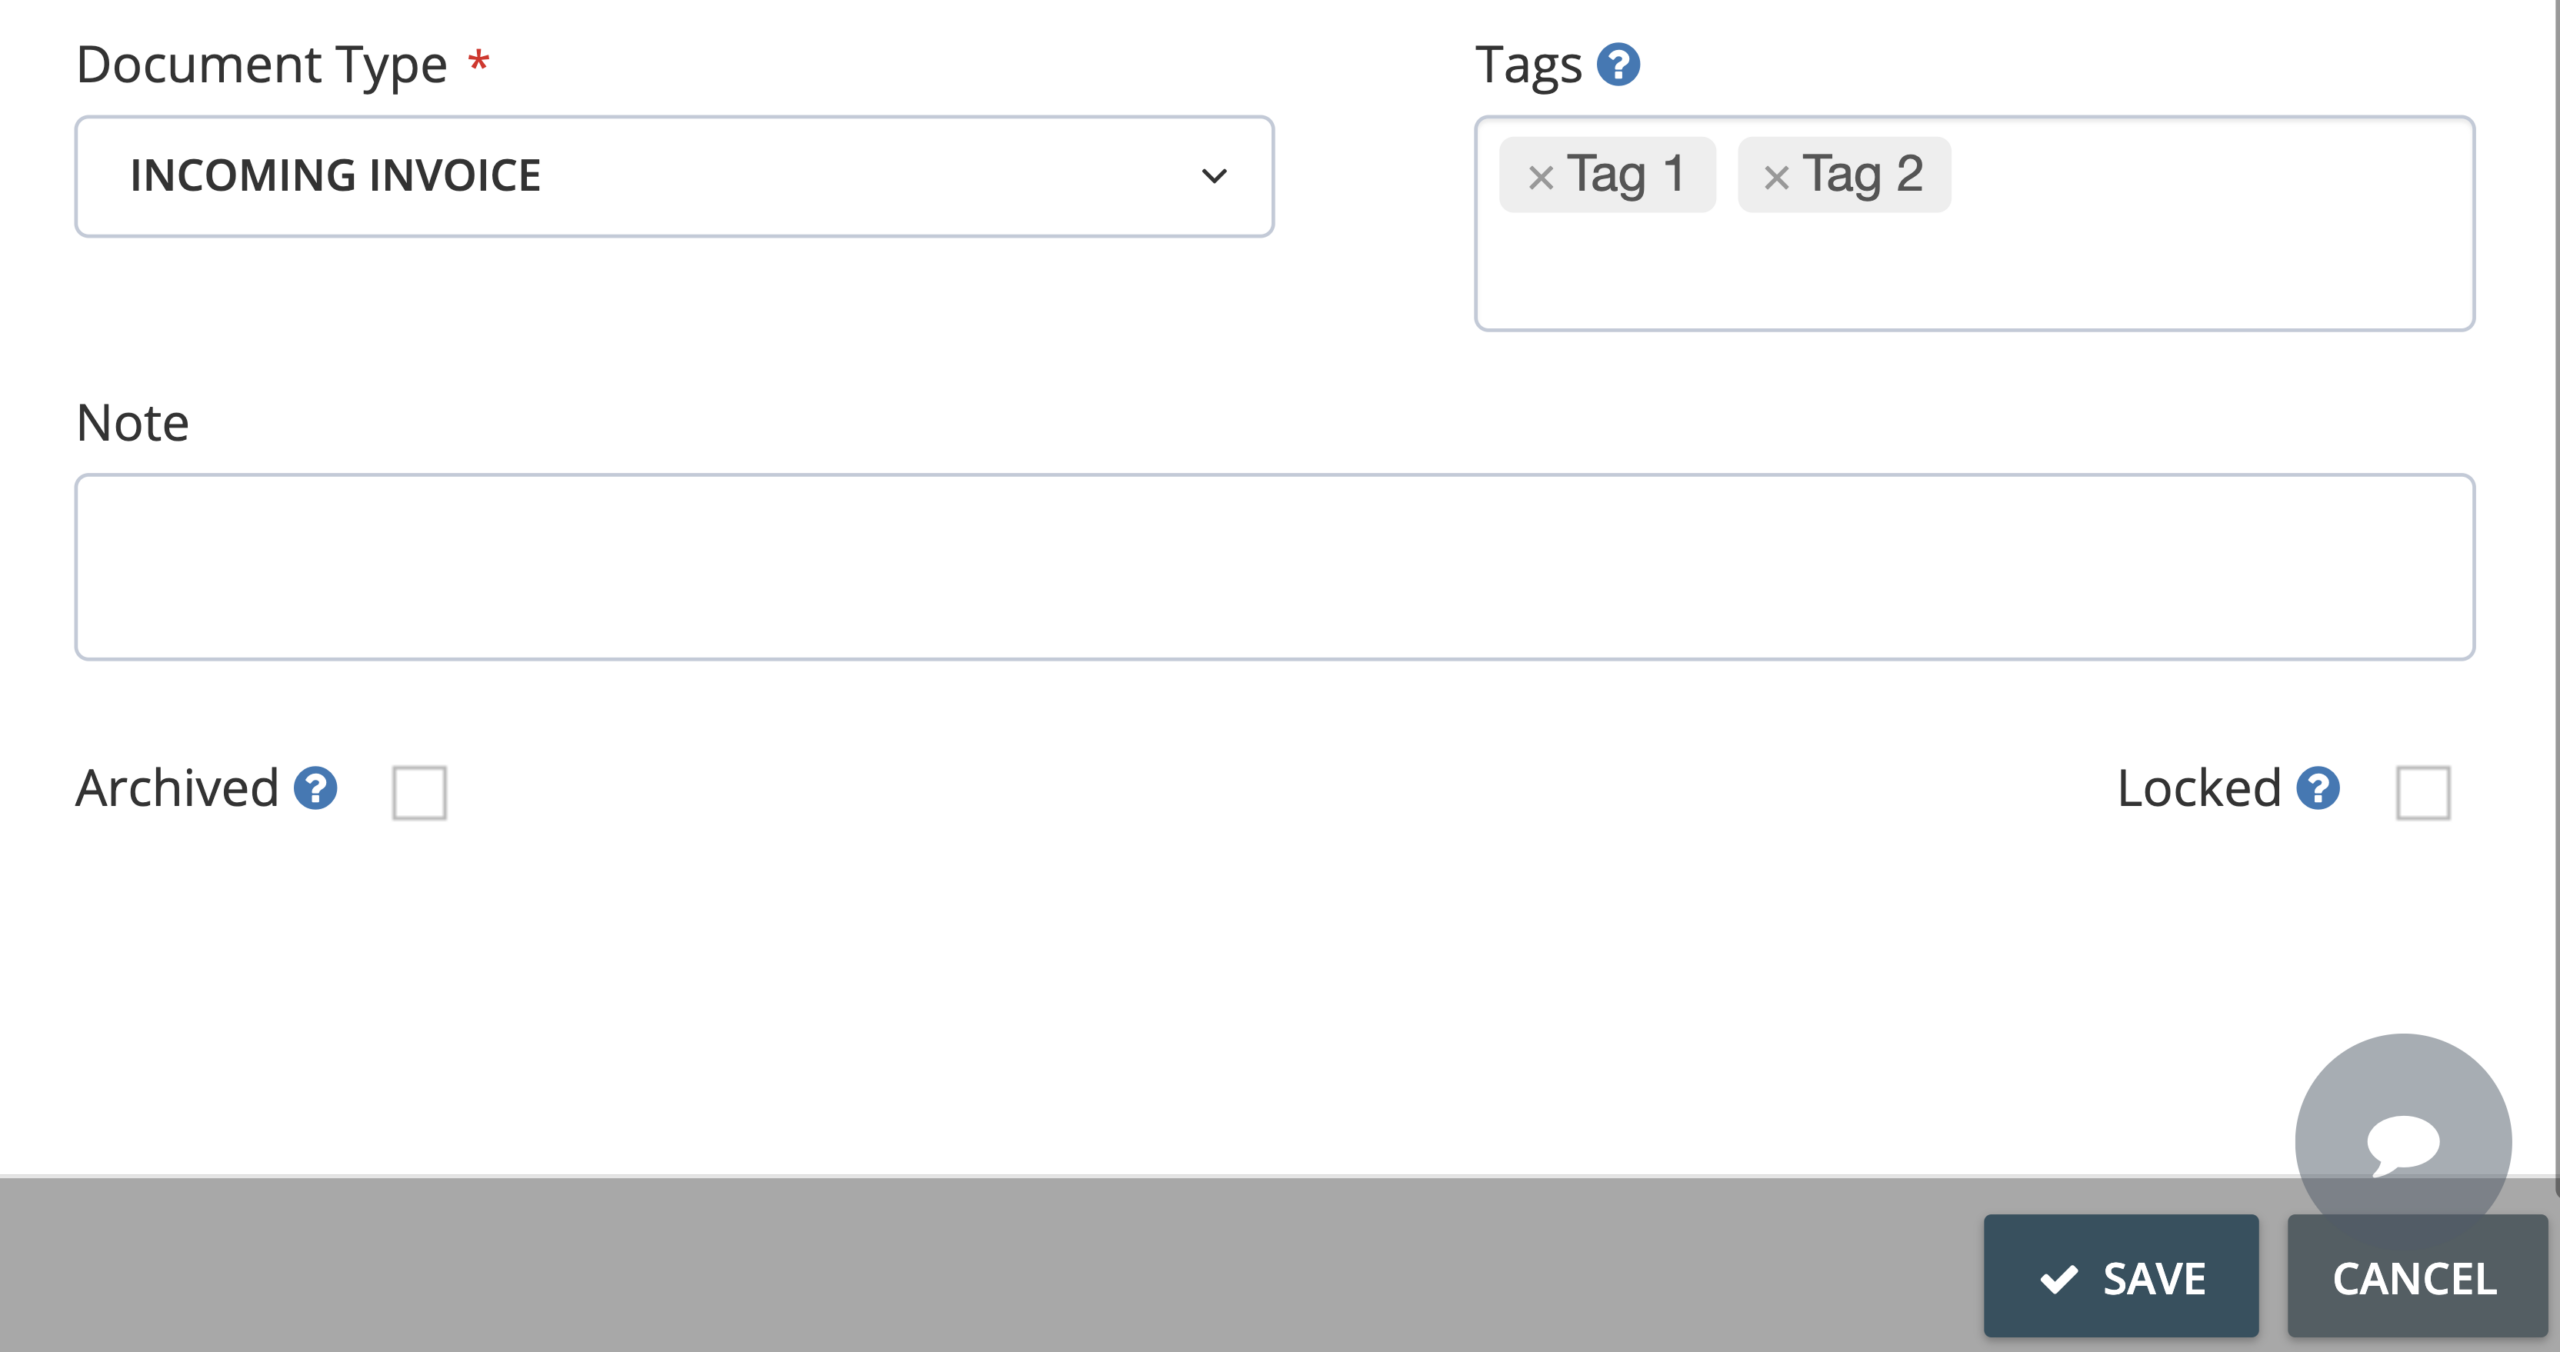
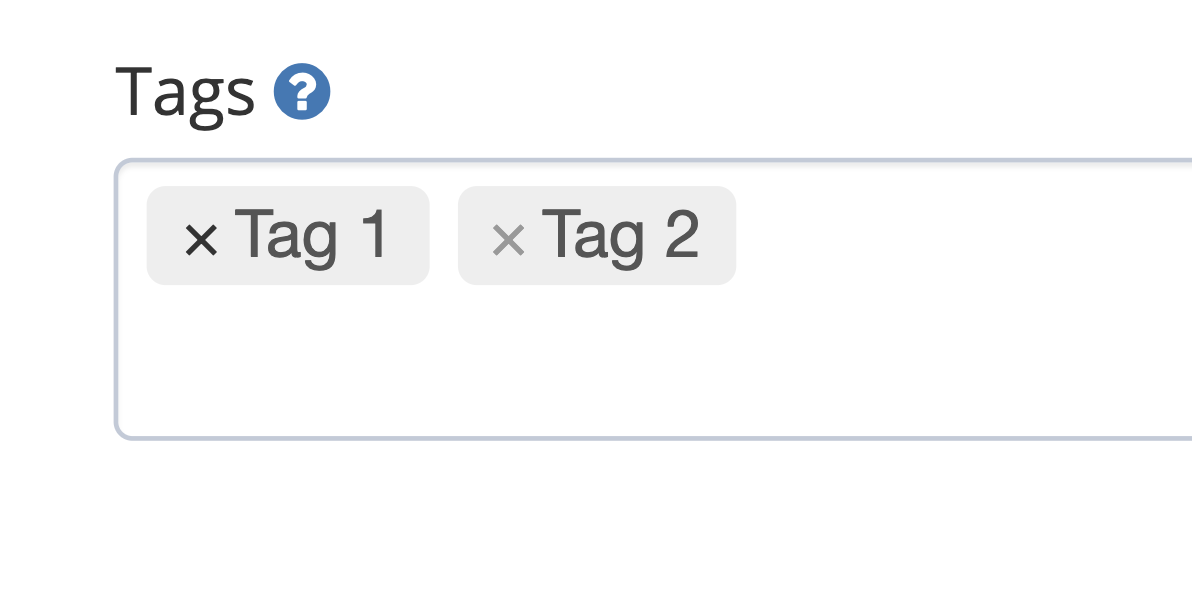
Step 3. Under the Basic tab, locate the text field labeled Tags. Type the name of the tag you want to assign to the selected document, then click it or hit Enter/Return.
Step 4. If you wish to tag the same document with more than one tag, repeat Step 3. Once done, click Save.
Assign tags to online portals/connected accounts
You can also assign tags to your connected online portals and accounts. This way you can easily organize your newly imported documents by automatically tagging them as they are imported.
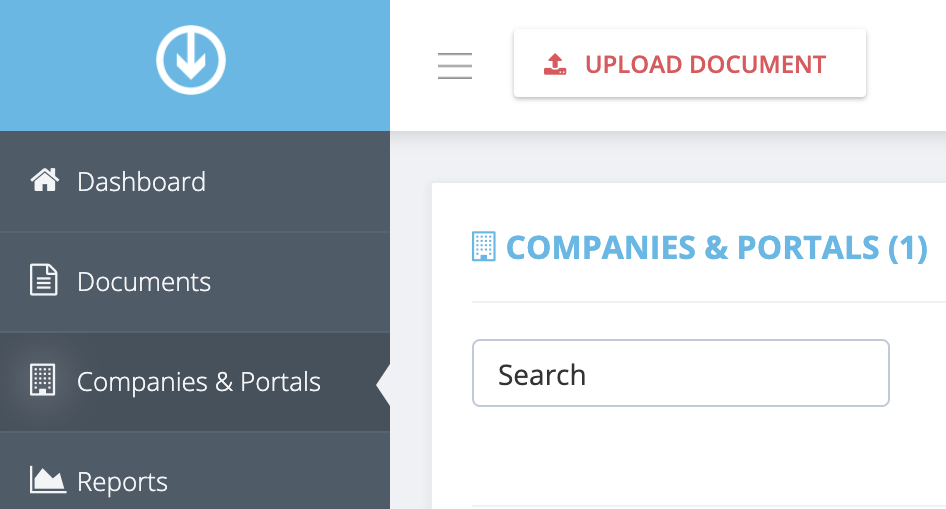
Step 1. From the GetMyInvoices dashboard page, navigate to the left-side menu then click Companies & Portals.
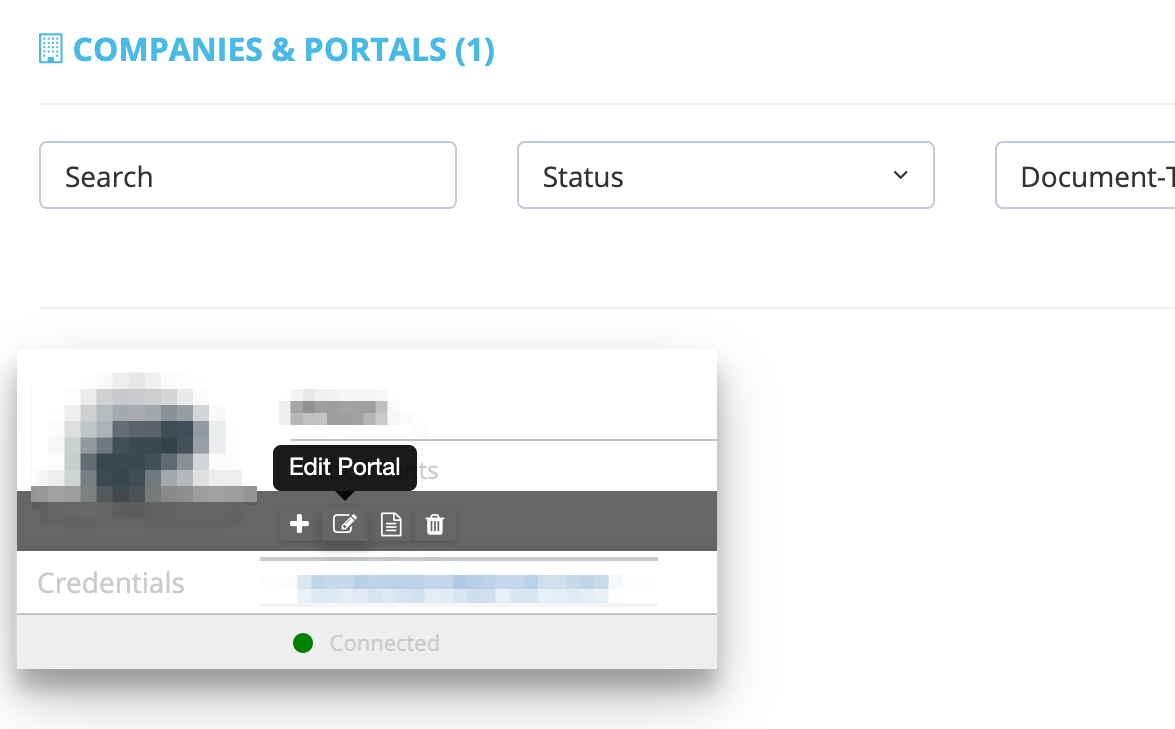
Step 2. On the Companies & Portals page, hover over the online portal that you want to assign tags to, then click Edit Portal.
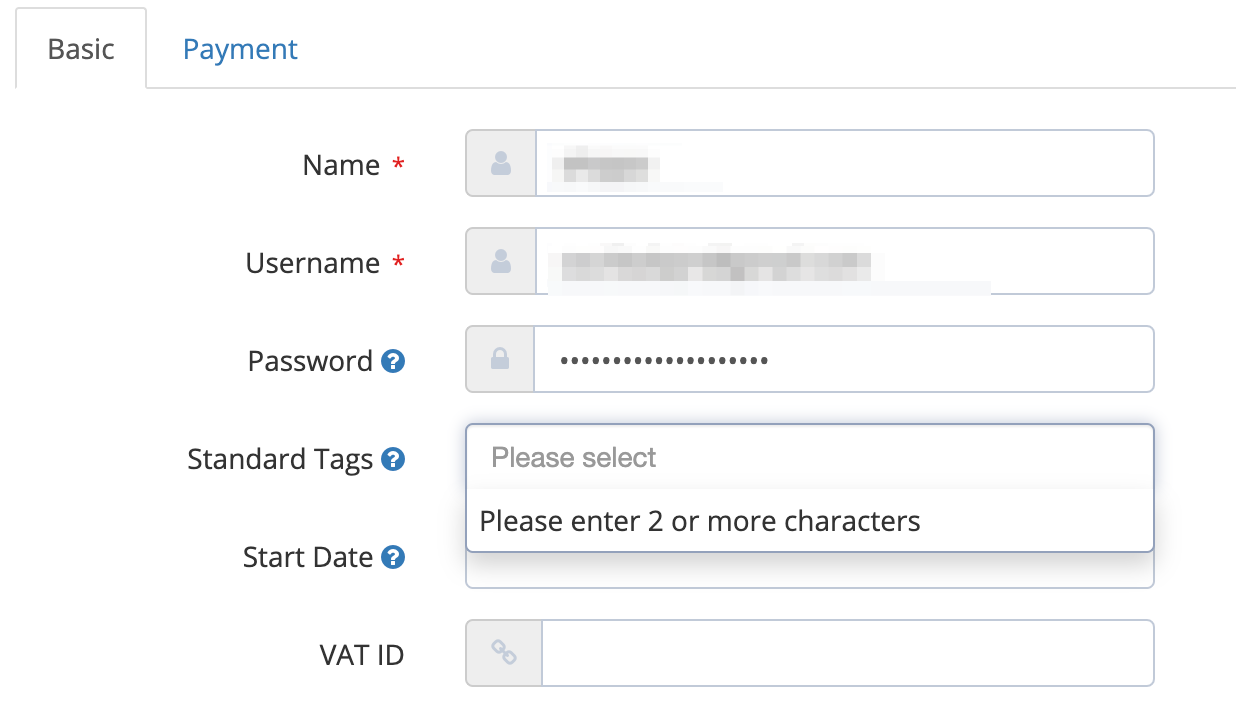
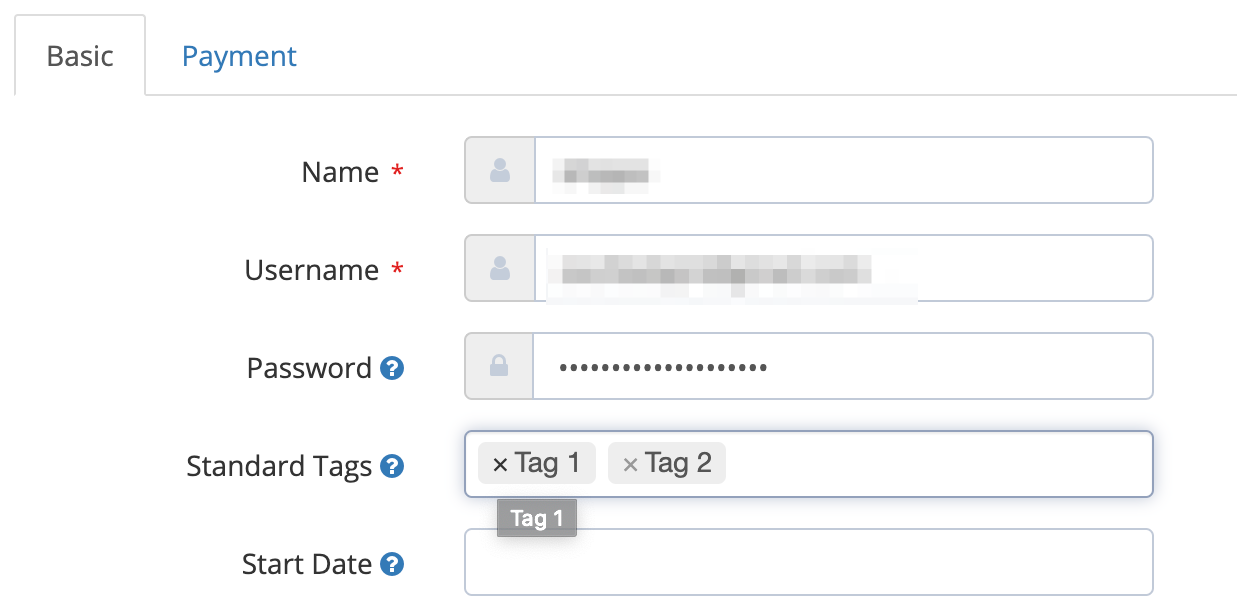
Step 3. Under Standard Tags, type in the name of the tags you want to assign to the portal, then click the name of the tag or hit Enter/Return. You can add more than one tag per portal.
Step 4. Click Save, then click Yes to confirm that you want to tag all existing imported documents from that portal as well as all future imports.
Remove tags from imported documents
If you want to unlink or remove tags from your imported documents as well as your online portals, follow these steps.
Step 1. From the GetMyInvoices dashboard page, click Documents on the left-side menu.
Step 2. Navigate to the document you want to remove tags from, then click Edit Document (notepad icon).
Step 3. Under the Basic tab, find the Tags entry field. Click the X icon next to each tag you want to remove from that document.
Step 4. Click the Save button to confirm your changes.
Remove tags from online portals/connected accounts
Here’s how to remove tags from your connected portals and accounts.
Step 1. From the GetMyInvoices dashboard page, click Companies & Portals on the left-side menu.
Step 2. Navigate to the connected online portal you want to remove tags from, then click Edit Portal.
Step 3. You should find all active tags associated with the online portal under Standard Tags. Click the X button next to the tag you want to remove from the online portal. Repeat for all other tags you wish to remove.
Step 4. Click the Save button to confirm your changes.
Delete tags you’ve created
If you want to get rid of tags from your GetMyInvoices account, follow these steps.
Step 1. From the GetMyInvoices dashboard, navigate to your account name on the top right corner, then click Tag Management on the drop-down menu.
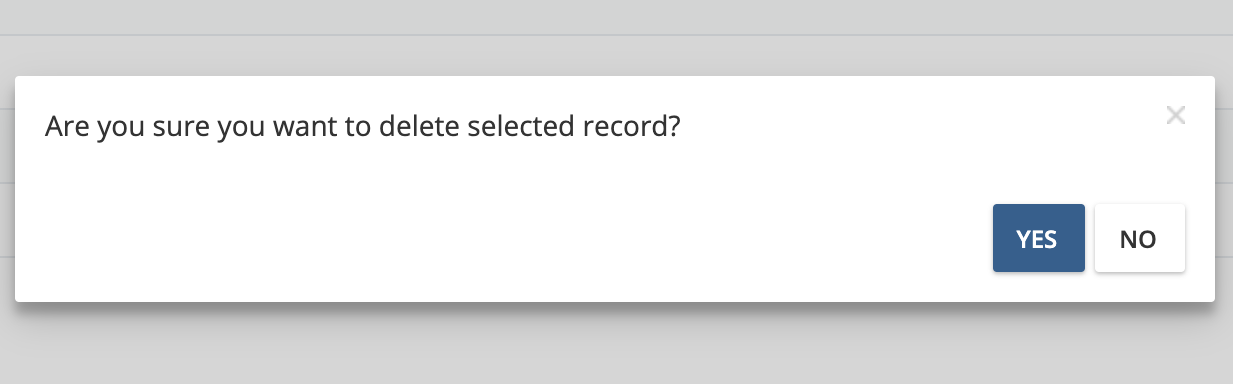
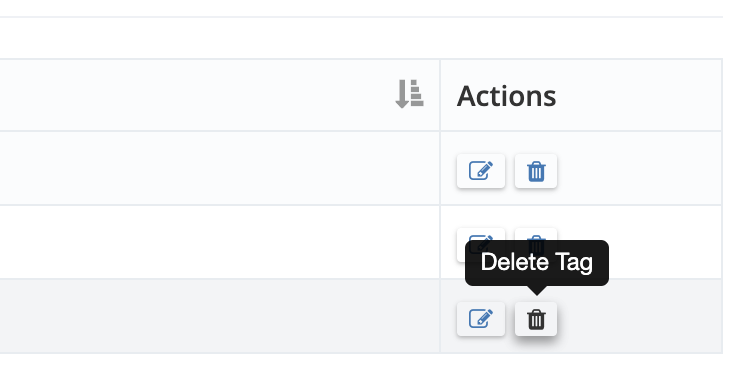
Step 2. All tags you have created will be listed on the Tag Management page. Under Actions, click the Delete Tag button next to the tag name you want to delete from your GetMyInvoices account.
Step 3. Confirm that you want to delete the tag on the pop-up dialog window by clicking Yes.